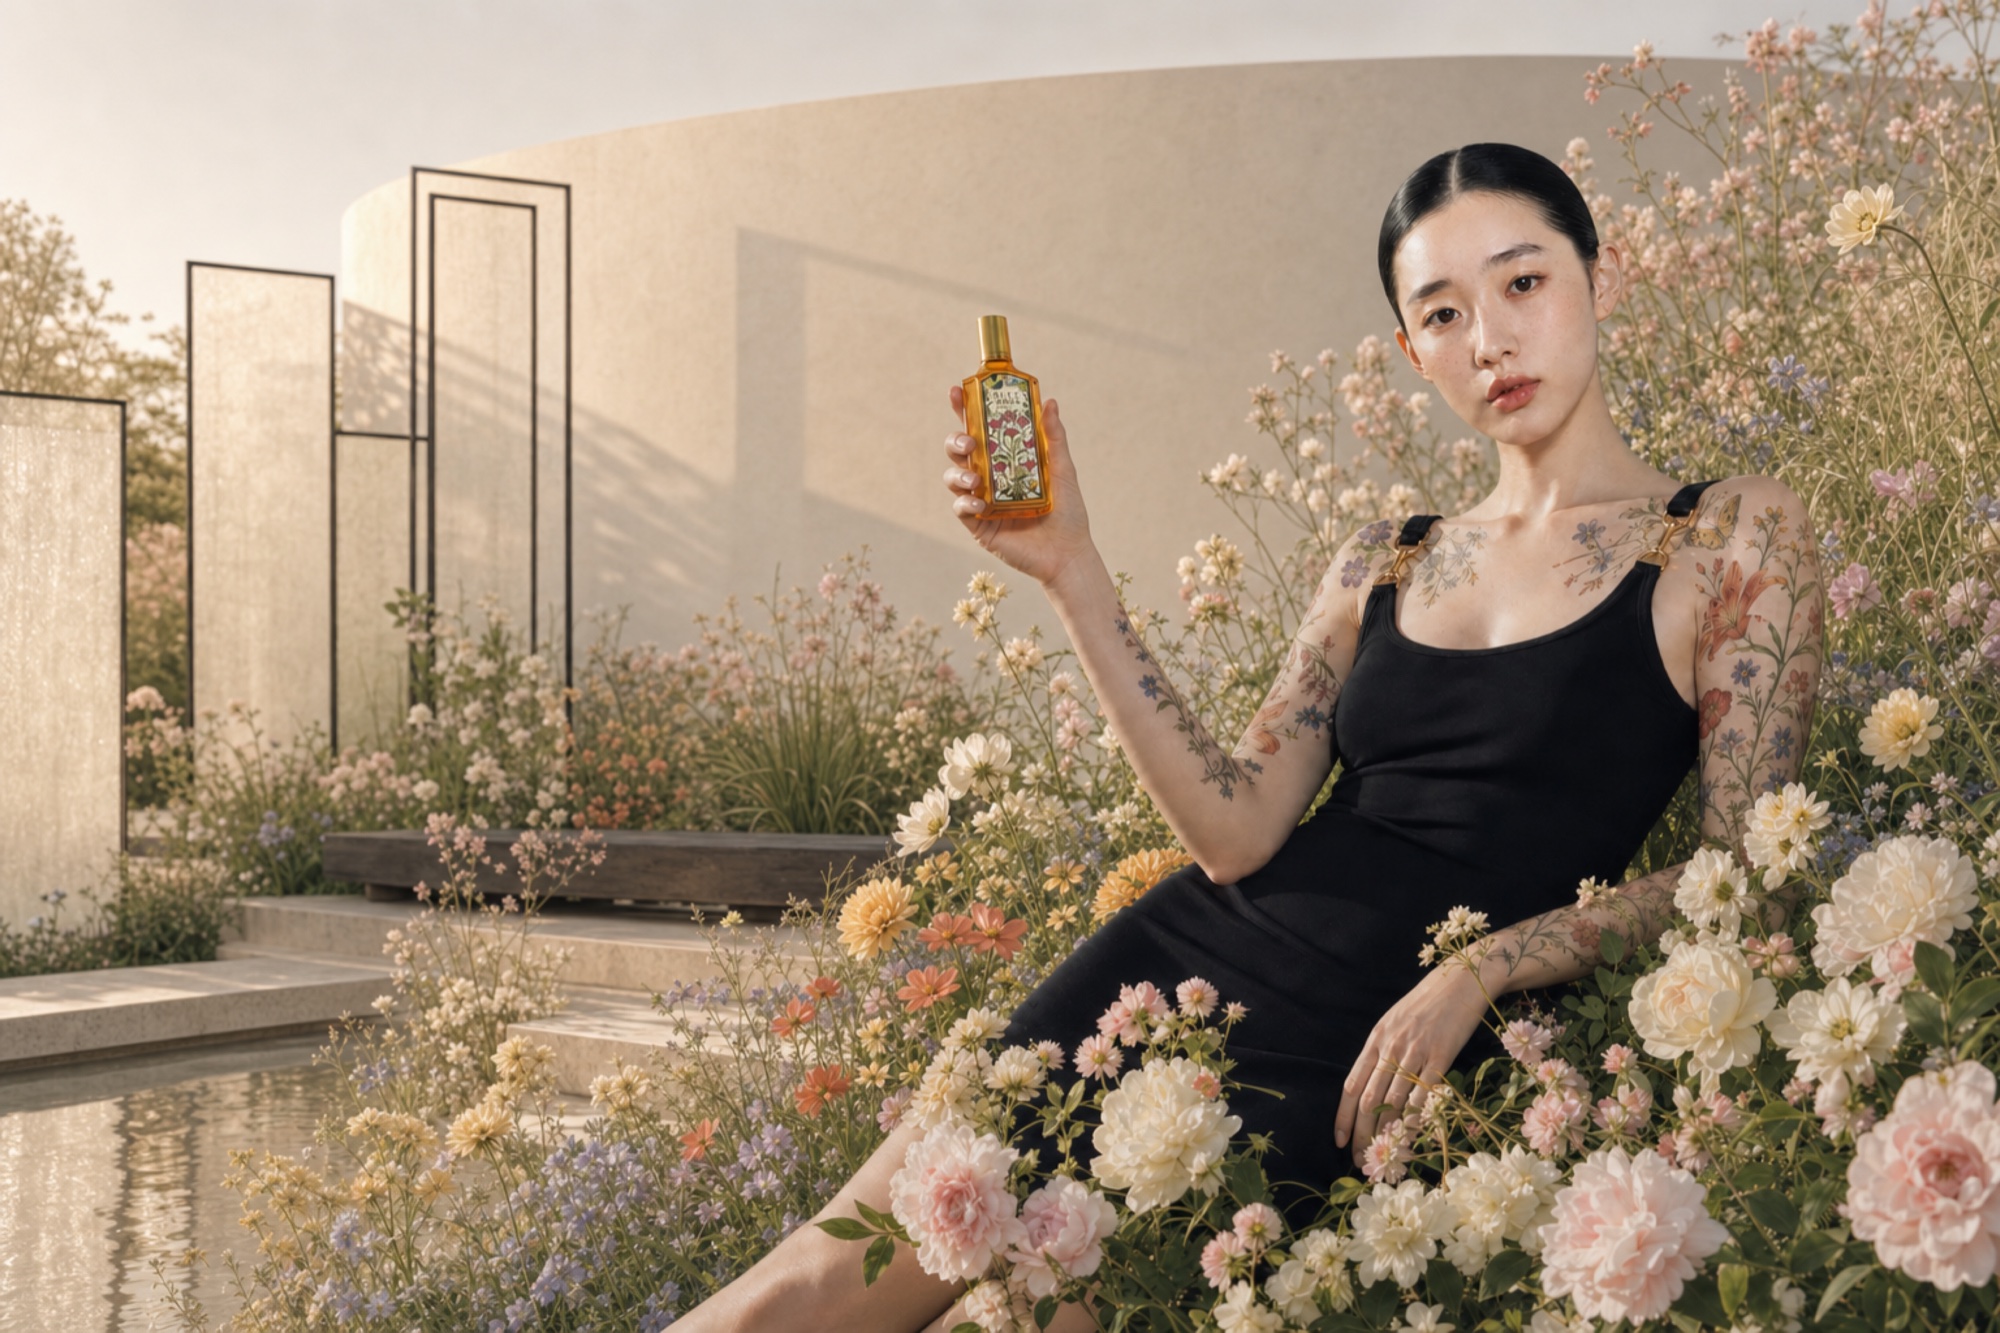
When making an advertising video with AI and no filming, what sequence keeps the character and tone consistent while reducing the time and cost of regeneration?
It started with hands-on experience.
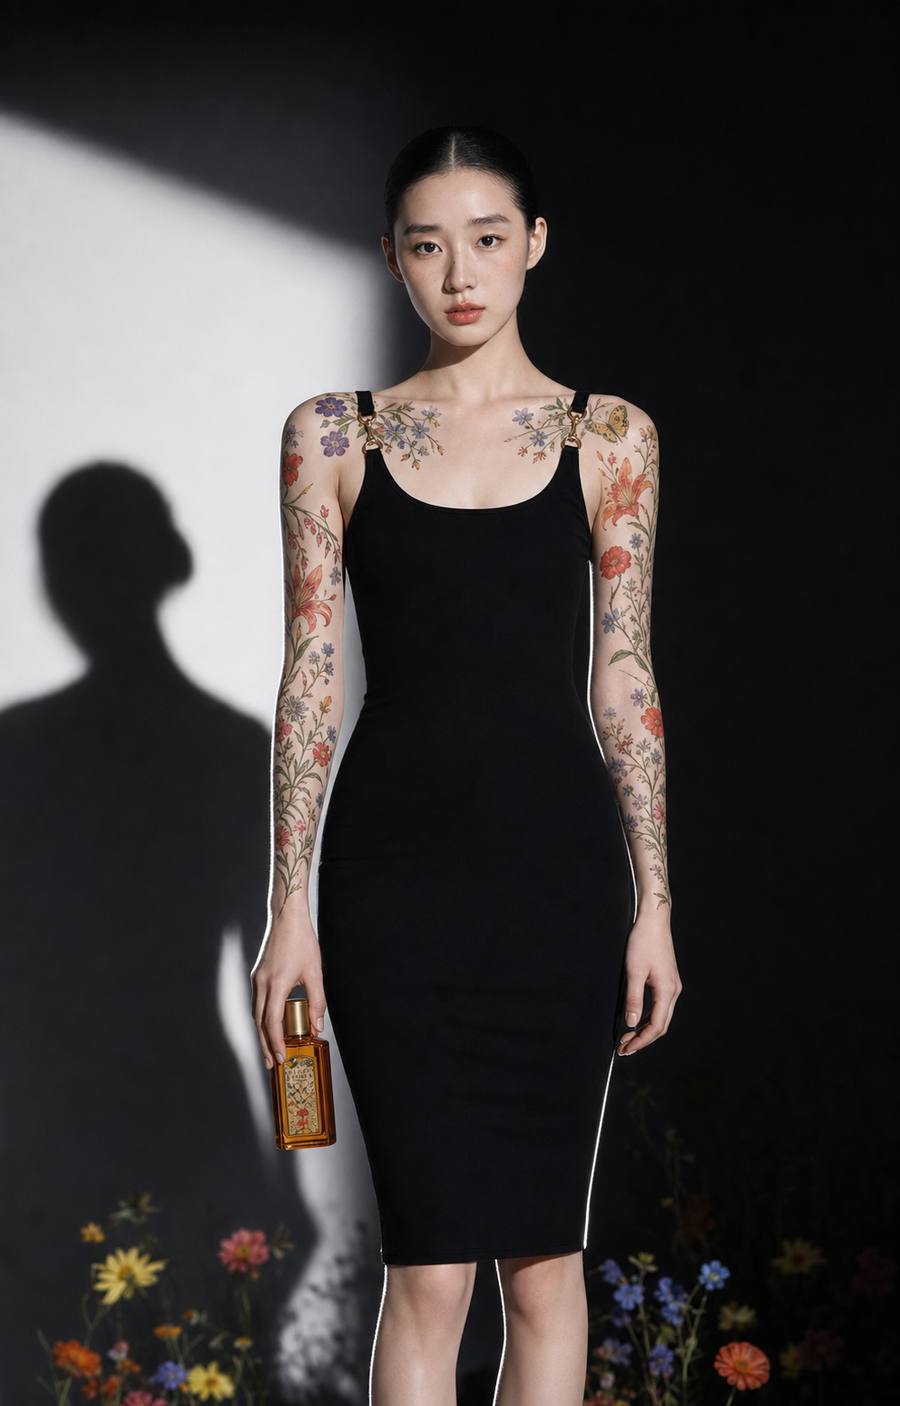
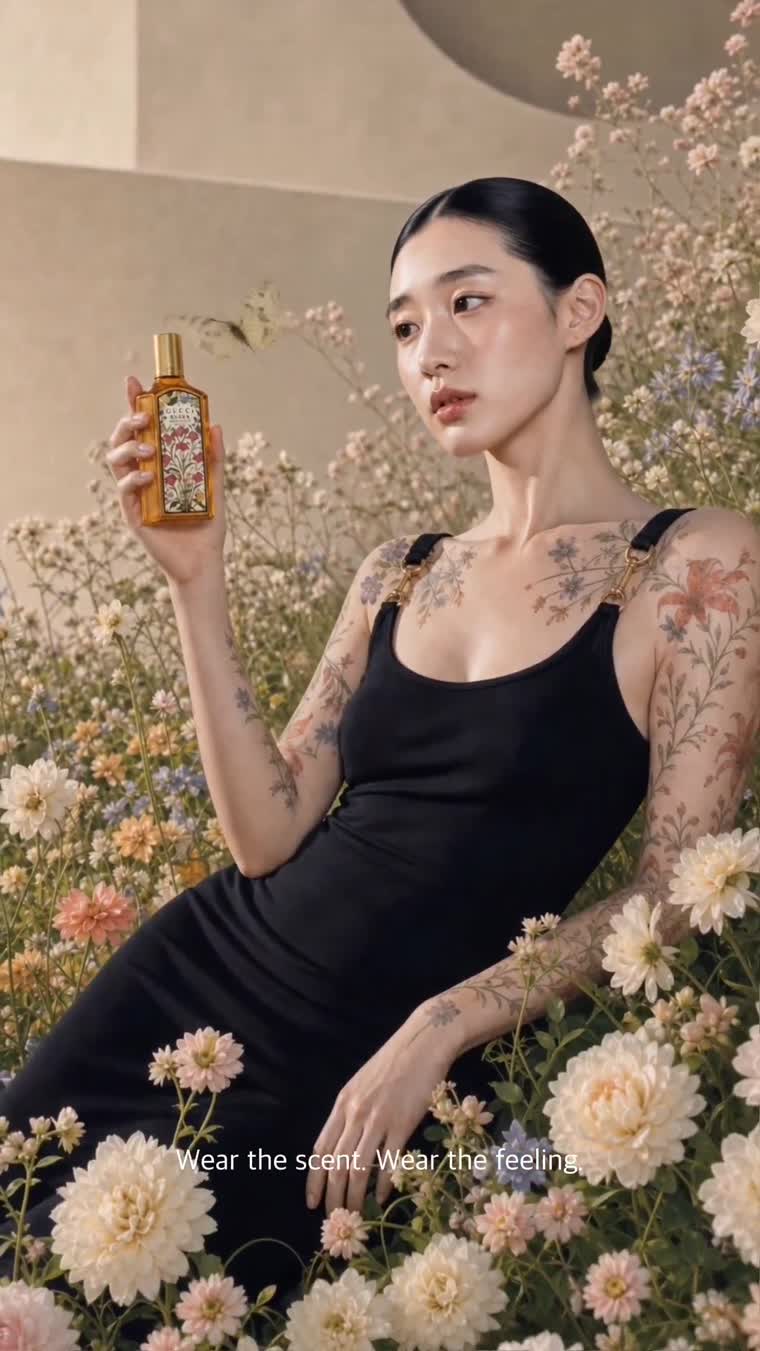
I created a 34.8-second vertical concept ad centered on a perfume product. Without filming or casting a model, I generated 11 images with AI, turned them into 6 video clips, and added 7 lines of English narration, background music, subtitles, and transitions. As a first attempt, it took about two days.
The finished result might look as though it came from a single command, but regeneration actually took the most time. The face changed with the angle, the clothing structure and product details drifted, and in some clips the fingers or facial expression broke down partway through. Voices and music, too, did not necessarily fit the brand's mood simply because they played correctly.
What this process made clear was that AI video production is not about memorizing the buttons in a particular program. I had to define the concept in words first, create reference sheets for the character and styling, generate shots in sequence, and review them with my own eyes and ears at short intervals. This article is a record of the actual production process, organized so that its sequence and decision criteria can be reused, rather than simply showcasing the finished result.
For this project, I used conversational AI as a workspace for planning and writing prompts, then connected image generation and enhancement tools, image-to-video tools, and an editing app at each stage. Because tool pricing and features can change, I do not present one combination as the correct answer. Instead, I used a process of comparing remaining credits, estimated usage, and the number of regeneration attempts available before producing anything.
Key perspective
The first factor that determines the quality of an AI advertising video is the sequence, not the tool. If you start generating images without a concept sentence, each shot develops a different world. If you create video without a storyboard, you reach editing without the connecting shots you need. Simply following the sequence of words → storyboard → reference sheets → images → video → sound → editing can greatly reduce unnecessary rework.
The second principle is to create the model sheet under the same conditions as the final result. If you make only a basic face sheet and then apply different clothing and hair in the actual ad, AI reinterprets those differences each time. Character consistency improved noticeably once I made a second reference sheet that included the actual clothing, hairstyle, and placement of distinctive features.
The third principle is to leave automation in charge only up to the draft stage. Even when AI reports that a task is 'complete,' you still need to play every clip to the end, check subtitle timing and music duration, and watch both with and without sound. As automation becomes faster, incorrect results can accumulate faster too, so human reviews need to happen more frequently, not less.
The final principle is to budget for regeneration as part of the process, not as failure. Planning time and credits on the assumption that a single shot will need several attempts reduces the risk of exhaustion midway through or spending the entire budget on an expensive model at once. It is safer to explore early on with an approach that allows repeated attempts, then reserve higher-quality methods for final shots.
The 10-Step AI Advertising Video Workflow at a Glance
These are approximate times for a first production. They may vary depending on the tools and number of regeneration attempts.
| Step | Core Task | Estimated Time | Deliverable |
|---|---|---|---|
| 1 | One-sentence concept | 10 minutes | 1 sentence defining the decision criteria |
| 2 | Creative brief and storyboard | 20 minutes | Shot list and prompts |
| 3 | Model sheets | 1 hour+ | Basic and final-condition reference sheets |
| 4 | Face anchors | 30 minutes | 6 reference files by angle |
| 5 | Advertising images | Half a day+ | 6 key images |
| 6 | Connecting shots | 2–3 hours | Approximately 5 images for video |
| 7 | Image → video | 2–3 hours | 6 clips of 3–4 seconds each |
| 8 | Narration and subtitles | 40 minutes | Voice files and SRT |
| 9 | Background music | 20 minutes | 1 music track longer than the video |
| 10 | Editing and review | 2–3 hours | Finished vertical video |
10 Steps to Creating an AI Advertising Video
What matters more than where the buttons are is what you ask for and in what order. You can reuse the prompts below by replacing the text in square brackets with details for your own product and brand.
-
01
Concept
Define the concept in one sentence.
Before making images, decide what you will show. A viewer should be able to understand the scene within 3 seconds, and the sentence must explain why the product appears. This sentence becomes the reference for the storyboard and every subsequent prompt.
A prompt to copy and useI want to make an advertising video for [product or brand]. Define the concept in one sentence. Here are the conditions: - The scene must be understandable within 3 seconds. - The sentence must explain why the product appears. Give me 5 options and a one-line explanation of the reasoning behind each.
What to checkIt passes if reading the sentence aloud brings a specific scene to mind.
Common mistakeStarting immediately with 'Make an advertising image' gives each shot a different visual world.
What this step taught meBefore a good first prompt, you need one sentence that lets you judge the results that follow.
-
02
Storyboard
Get the creative brief and storyboard first.
Without generating images yet, document the concept, mood, styling, purpose of each scene, and shot-by-shot prompts. The document should explain why every shot is needed in the overall story.
A prompt to copy and useWrite an advertising creative brief for this concept. 1) Concept title 2) Core visual story 3) Mood and color palette 4) Styling direction 5) 10 art direction keywords 6) Scene-by-scene storyboard: purpose / what to emphasize / role in the overall piece 7) Image generation prompts for each shot Do not generate images yet. Give me only the document first.
What to checkIt passes if the storyboard specifies at least 6 shots and the purpose of each.
Common mistakeUnless you explicitly say 'Do not generate images yet,' generation may begin before the planning is organized.
What this step taught meA storyboard is not just an idea document. It is the reference for selecting and rejecting generated results later.
-
03
Character System
Create the model sheet twice.
The first sheet is a basic reference for comparing facial and body angles. The second is a final-condition reference that incorporates the actual ad's clothing, hairstyle, and even the placement of patterns or tattoos. Generating the necessary angles separately and comparing them side by side proved more accurate than crowding many angles onto a single sheet.
A prompt to copy and useCreate a model sheet for this concept. This is a reference sheet, not an advertising shot. Include front, 3/4, side, and rear views of the head; 4 full-body views; 6 expressions; and a map of distinctive feature placements. Use a plain gray background and flat lighting. Then apply the actual ad's [clothing], [hairstyle], and [feature placements], and generate each view separately: face front / face side / upper body front / upper body 3/4 / full body front / rear. Also save the regeneration prompts as text.
What to checkViewed side by side, the images should show the same person, with consistent clothing structure and feature placement.
Common mistakeMaking the reference sheet look like a polished advertising shot, or using only one basic sheet, leads to major character drift in the actual scenes.
What this step taught meThe smaller the gap between reference-sheet conditions and the final result, the less room AI has to reinterpret things on its own.
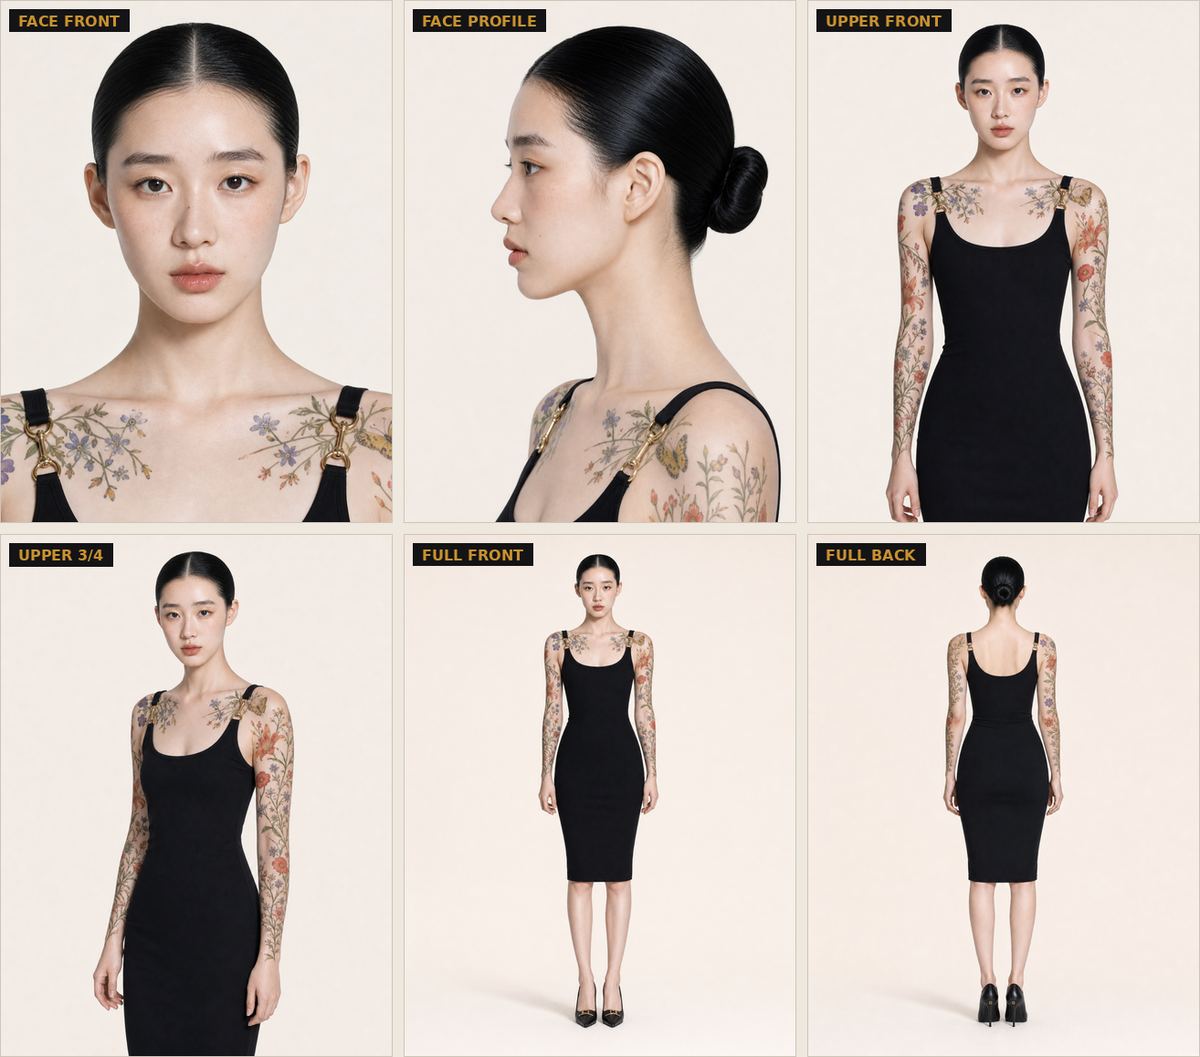
The final-condition model sheet: front and side face views, upper-body views, and front and rear full-body views recreated with the same clothing and hair. -
04
Reference Files
Separate face anchor files by angle.
Separate the front and side face views, upper-body views, and front and rear full-body views from the model sheet into individual high-resolution files. When generating advertising shots later, attaching the anchor file for the required angle produces less facial drift than attaching only the whole sheet.
A prompt to copy and useCreate separate high-resolution files from this sheet for face front / face side / upper body front / upper body 3/4 / full body front / full body rear. Use a consistent 3:4 aspect ratio and name the files in sequence from 01 to 06.
What to checkIt passes if all 6 files exist and follow the same aspect ratio and naming convention.
Common mistakeWithout assigned file names, you will have to search again for the correct angle once the generated files pile up.
What this step taught meEven in AI production, file naming and version control are important design work that protects consistency.
-
05
Key Visuals
Build the advertising images around a full-body reference shot.
Create key images that cover the product alone, the moment of use, the beginning of a transformation, a detail, a full-body view, and the ending. I finalized the full-body shot first and used its lighting and color as the reference for the other scenes. Preserve versions without overwriting the originals.
A prompt to copy and useUse the face files created earlier as references so the same person appears. 1) Product alone 2) The moment of using the product 3) The moment a transformation begins 4) Detail 5) Full body 6) An ending in which the product appears again Generate shot 5, the full-body shot, first, then match the rest to its lighting and color. Keep all aspect ratios and resolutions consistent, and do not overwrite the originals.
What to checkWhen the 6 images are displayed together, they should look as though they were photographed in the same place on the same day.
Common mistakeStarting with whichever scene you like most leaves you without a reference, causing the tone to vary between shots.
What this step taught meThe first finished shot is both a deliverable and the visual standard governing the remaining scenes.

The key image for the moment of product use. Only the scene's role changes; the reference face and lighting remain consistent. -
06
Bridge Shots
Add the connecting shots the video needs.
Six strong advertising images alone do not make a moving narrative flow naturally. First ask for an analysis of what is missing between the current shots, then add the missing connecting scenes in the same tone.
A prompt to copy and useI want to make a 20-second video from these 6 shots. First analyze what additional scenes are needed. Generate the missing connecting shots with the same character, clothing, and lighting, then number and organize all shots in playback order.
What to checkAs you flip through the images in order, cause and effect should remain connected between scenes.
Common mistakeSkipping this step means discovering missing shots during editing, when newly generated faces and tones may no longer match.
What this step taught meThe quality of a still image and the continuity of a video are different problems.
-
07
Image to Video
Turn the images into video by specifying start and end frames.
Keep each clip short at 3–4 seconds, and specify both a starting and ending image whenever possible. Before generating, compare remaining credits, available models, and estimated usage. Plan on video requiring more regeneration attempts than images.
A prompt to copy and useTurn these shots into video using the connected image-to-video tool. - Vertical 9:16 - 3–4 seconds per shot - Specify both start and end images to keep the character consistent First tell me 1) the remaining credits and 2) each model's characteristics and estimated usage. Generate only after I choose a model.
What to checkPlay each clip through to the end and check that the face, fingers, and product shape do not change partway through.
Common mistakeGenerating with defaults without comparison can consume your credits on an expensive model first.
What this step taught meHaving enough production capacity to try again as often as needed is often more important than maximum quality on a single attempt.
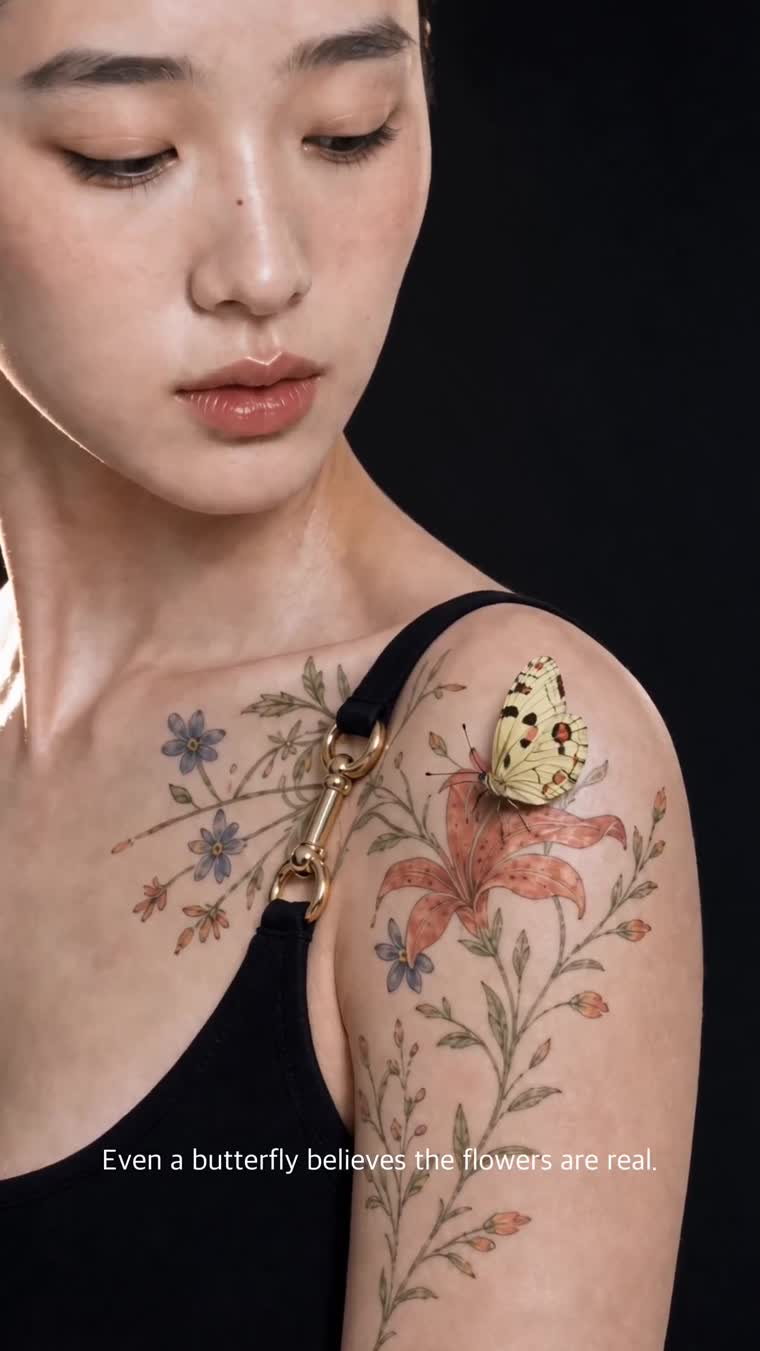
After animation, check that the face and details hold together in the middle frames, not just in the first frame. -
08
Voice & Subtitle
Create the narration and subtitle timing together.
Use a low-cost approach for the first voice track to check the overall duration, then replace it with a voice suited to the brand's tone once the copy and flow are settled. Have the subtitle timings calculated into an SRT file by measuring the actual playback duration of each voice file.
A prompt to copy and useWrite short narration line by line to fit the video's duration. Generate a voice file for each line, measure the actual speaking duration, and create a subtitle file (SRT) as well. For the final voice, first let me hear 3 options with [a calm female voice / a low, restrained tone].
What to checkDo not just look at the waveform. Listen all the way through to the voice's pace and emotion yourself.
Common mistakeCommitting to a paid voice early, while the copy may still change, increases revision costs.
What this step taught meA technically clear voice and a voice that suits the brand are not the same thing.
-
09
Music
Create background music slightly longer than the video.
Rather than spending a long time searching stock music, generate it by specifying both the atmosphere you want and what to exclude. Since the video length may change during editing, make the music about 3 seconds longer and apply a fade-out at the end.
A prompt to copy and useCreate instrumental background music with no lyrics. - No drums - Build slightly toward the latter part - Make it 3 seconds longer than the video - Fade out over the last 2 seconds
What to checkWhen played over the video from beginning to end, the music should not cut off abruptly.
Common mistakeMaking music exactly the same length as the video can leave it too short if the edit changes the duration.
What this step taught meSound is not a finishing decoration. It is a layer that reshapes the video's pace and emotion.
-
10
Edit & Review
After editing, open it, listen, and check again yourself.
Build the timeline in four layers: video, background music, narration, and subtitles. Slow down clips with excessive movement, and adjust transitions and audio levels. Even if the automation reports completion, open the editing app yourself to inspect the tracks.
A prompt to copy and useAssemble the clips in order and add narration, music, and subtitles to create a vertical video. - Short dissolves between shots - Subtitles at the bottom - Lower the music volume during narration - Slow fast clips to 0.8x speed - 9:16 MP4 When finished, tell me how the tracks are arranged. I will open it and check it myself.
What to checkWatch from beginning to end once with sound and once without. Check subtitles, music duration, and the final frame.
Common mistakeTrusting the 'complete' report and publishing immediately leaves timing issues and details the automation missed.
What this step taught meAI makes a fast draft. The final quality comes from the number of times a person reviews it and makes a choice.
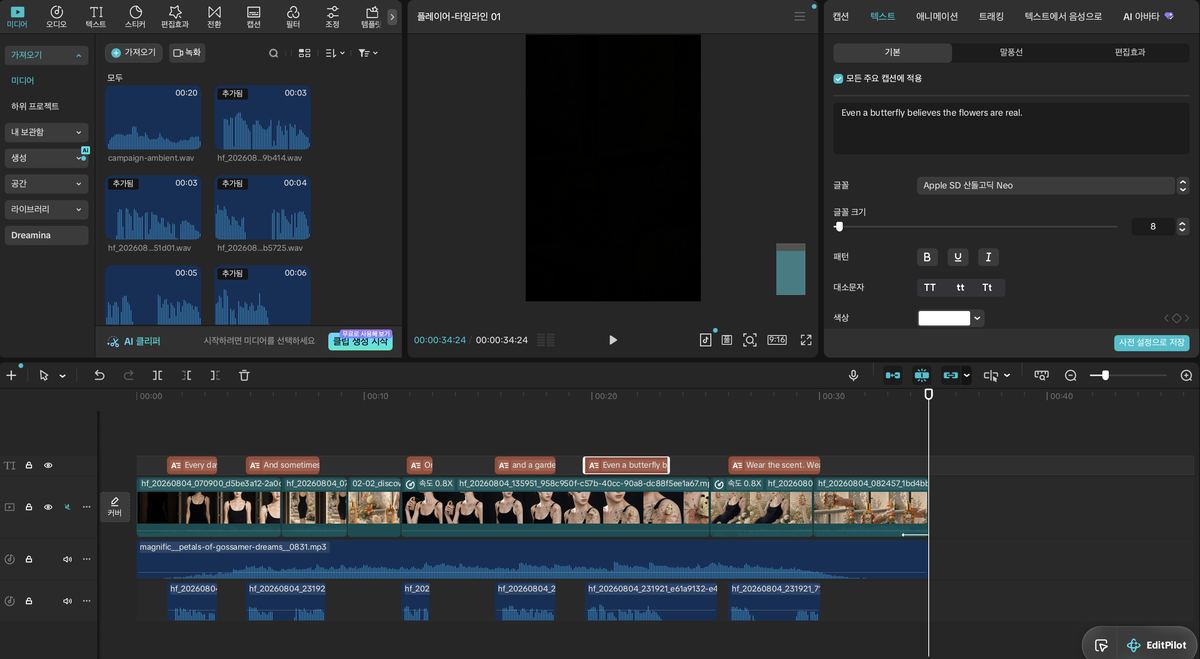
The actual editing timeline, with video, music, narration, and subtitles separated for individual review.
For a First Attempt, Start with a 10-Second Mini Version
Completing the whole workflow first with a product video that has no people lets you learn the production structure before attempting a more complex version.
- 01ConceptOne sentence · 10 minutes
- 02Product Shots3 images · About 1 hour
- 03Video3 clips · 3 seconds each
- 04Music1 track, no narration
- 05FinishAssemble and export as 10 seconds
Where Human Intervention Was Essential
Every problem the automation failed to detect became apparent only when I opened and played the work myself.
I reopened the completed timeline.
Automatic placement alone did not finalize subtitle start times, narration positions, music duration, or clip speed.
What to aim forI checked the tracks one by one, slowed fast clips to 0.8x speed, and manually adjusted subtitle size and color.
I remade the model sheet under the actual conditions.
Using only the basic sheet led to considerable variation in the character and clothing from shot to shot.
What to aim forI reduced the discrepancies by making a second reference sheet with the actual clothing, hair, and feature placement.
I changed the narration voice.
The first voice communicated the information adequately, but did not fit the ad's emotion.
What to aim forI listened to the candidates myself and selected a new voice that suited the scenes' pace and mood.
I regenerated the music and refined the ending.
The music was shorter than the video and cut off at the end; one version also clashed with the overall tone.
What to aim forI remade it longer than the video, applied repetition and a fade-out, and played it through to the end.
I narrowed the scope of each revision request.
Fixing the face repeatedly changed the pose, and fixing the product changed the lighting.
What to aim forI revised only one element at a time, with instructions such as 'Keep the pose, hands, product, and lighting unchanged; edit only the face.'
Actual Roadblocks and Workarounds
When three attempts with the same method did not solve a problem, changing the approach was faster than repeating it.
The face changed with each angle.
Even with the model sheet, facial features drifted in profile and action shots.
What to aim forI attached the most accurate front-facing image separately and edited only the face while preserving all other elements.
I remade the same shot several times.
Neither images nor videos consistently produced the desired result on the first attempt.
What to aim forI built 'one shot = several attempts' into the schedule and budget, treating regeneration as part of the process rather than failure.
Credit usage differed between models.
Even videos of the same duration consumed very different amounts depending on the chosen model.
What to aim forI checked the balance and estimated usage for each model before generating, and used different tools for early exploration and final generation.
Editing app automation did not work.
Adding audio to the timeline failed through several different methods.
What to aim forI switched to a workaround: export the edit as video first, then combine the sound and subtitles separately.
The computer locked during the work.
Automation that operates the screen directly is interrupted by screen locking and notifications.
What to aim forBefore long tasks, I disabled screen locking and notifications and saved output files at each stage.
The Tools Actually Used and Their Roles
This is the combination used for this project. Separating the role of each stage matters more than the tool names. Features, prices, and credit policies can change, so check them again before production.
Codex (ChatGPT)
I used it for concept planning, storyboards and prompts, built-in image generation, and organizing file names and the work sequence. It served as the workspace directing the overall production.
What to aim forRather than starting with images, I finalized the planning document and decision criteria before moving to the next tool.
Claude
An alternative that can serve as a conversational workspace like Codex. There is no need to use both simultaneously in actual production; choose the one you are comfortable with.
What to aim forChoose based on whether you can carry planning, prompts, and file organization forward within one conversation.
Magnific
I used it to generate character and product images and enhance final image quality. I also obtained this project's background music track from Magnific.
What to aim forI controlled costs by exploring quickly with the conversational tool's built-in generation and enhancing only the final candidates in Magnific.
Higgsfield
I used it to turn finished still images into short motion clips and to choose the final narration voice.
What to aim forBefore generation, I compared model characteristics and credit usage, then specified start and end images to produce clips of 3–4 seconds each.
CapCut
I used it for the final edit of video clip placement, subtitles, narration and background music tracks, speed, and transitions.
What to aim forOn a vertical 9:16 timeline, I kept video, music, narration, and subtitles separate and checked each track myself.
“The quality of an AI advertising video comes not from a single generation, but from the sequence of setting standards, reviewing, and making it again.”
Park Siha · SIHA
Putting it into practice
- 01Use automation to make a fast draft, not a finished product.
- 02Create model sheets under the same conditions as the final scenes, including the actual clothing, hair, and distinctive features.
- 03Do not change the order: concept sentence → storyboard → prompts → images.
- 04Inspect images at enlarged size, and always play videos and audio through to the end.
- 05Preserve originals without overwriting them, keeping versions such as v2 and v3.
- 06Instead of saying 'Redo this shot,' specify what to retain and which single element to change.
- 07Before generating, check remaining credits, estimated usage, and how many regeneration attempts are possible.
- 08If the same method fails three times, find another route rather than repeating it.
12 Things to Check Before Publishing the Finished Video
Passing every item below can reduce major mistakes involving character consistency, costs, subtitles, and rights disclosures.
Is the concept written in one sentence?
Does the model sheet include the actual clothing and hairstyle?
Have the prompts for regenerating the model sheet been saved?
Do all images have consistent resolution and aspect ratio?
When key shots are viewed side by side, do the person and lighting look consistent?
Has every video clip been played individually through to the end?
Do the subtitles match the actual speech timing?
Was the narration voice chosen after listening to it yourself?
Does the music continue through the end of the video and finish naturally?
Has the finished version been reviewed both with and without sound?
Are all original image, video, and audio files still available?
If an actual brand was used, is the work clearly labeled as an unofficial concept?
Further thoughts
Starting with a 30-second video featuring a character and narration can leave you exhausted by regeneration and editing before you have learned the standards. For a first attempt, try completing a 10-second video using 3 product shots with no people. A one-sentence concept, shots of the product alone, in use, and at the close, a 3-second video for each shot, and one background music track are enough to experience the entire production workflow.
Once you complete it once, you can reuse the same sequence even when the product and brand change. The concept and visual language change; the production principles remain: define the criteria in words, establish consistency through reference sheets, and have a person review everything through to the end.
The campaign included in this article is an unofficial concept project unaffiliated with the actual brand. The people and product images were generated with AI. This article is not intended to advertise any particular generation tool or recommend it as the only correct choice.