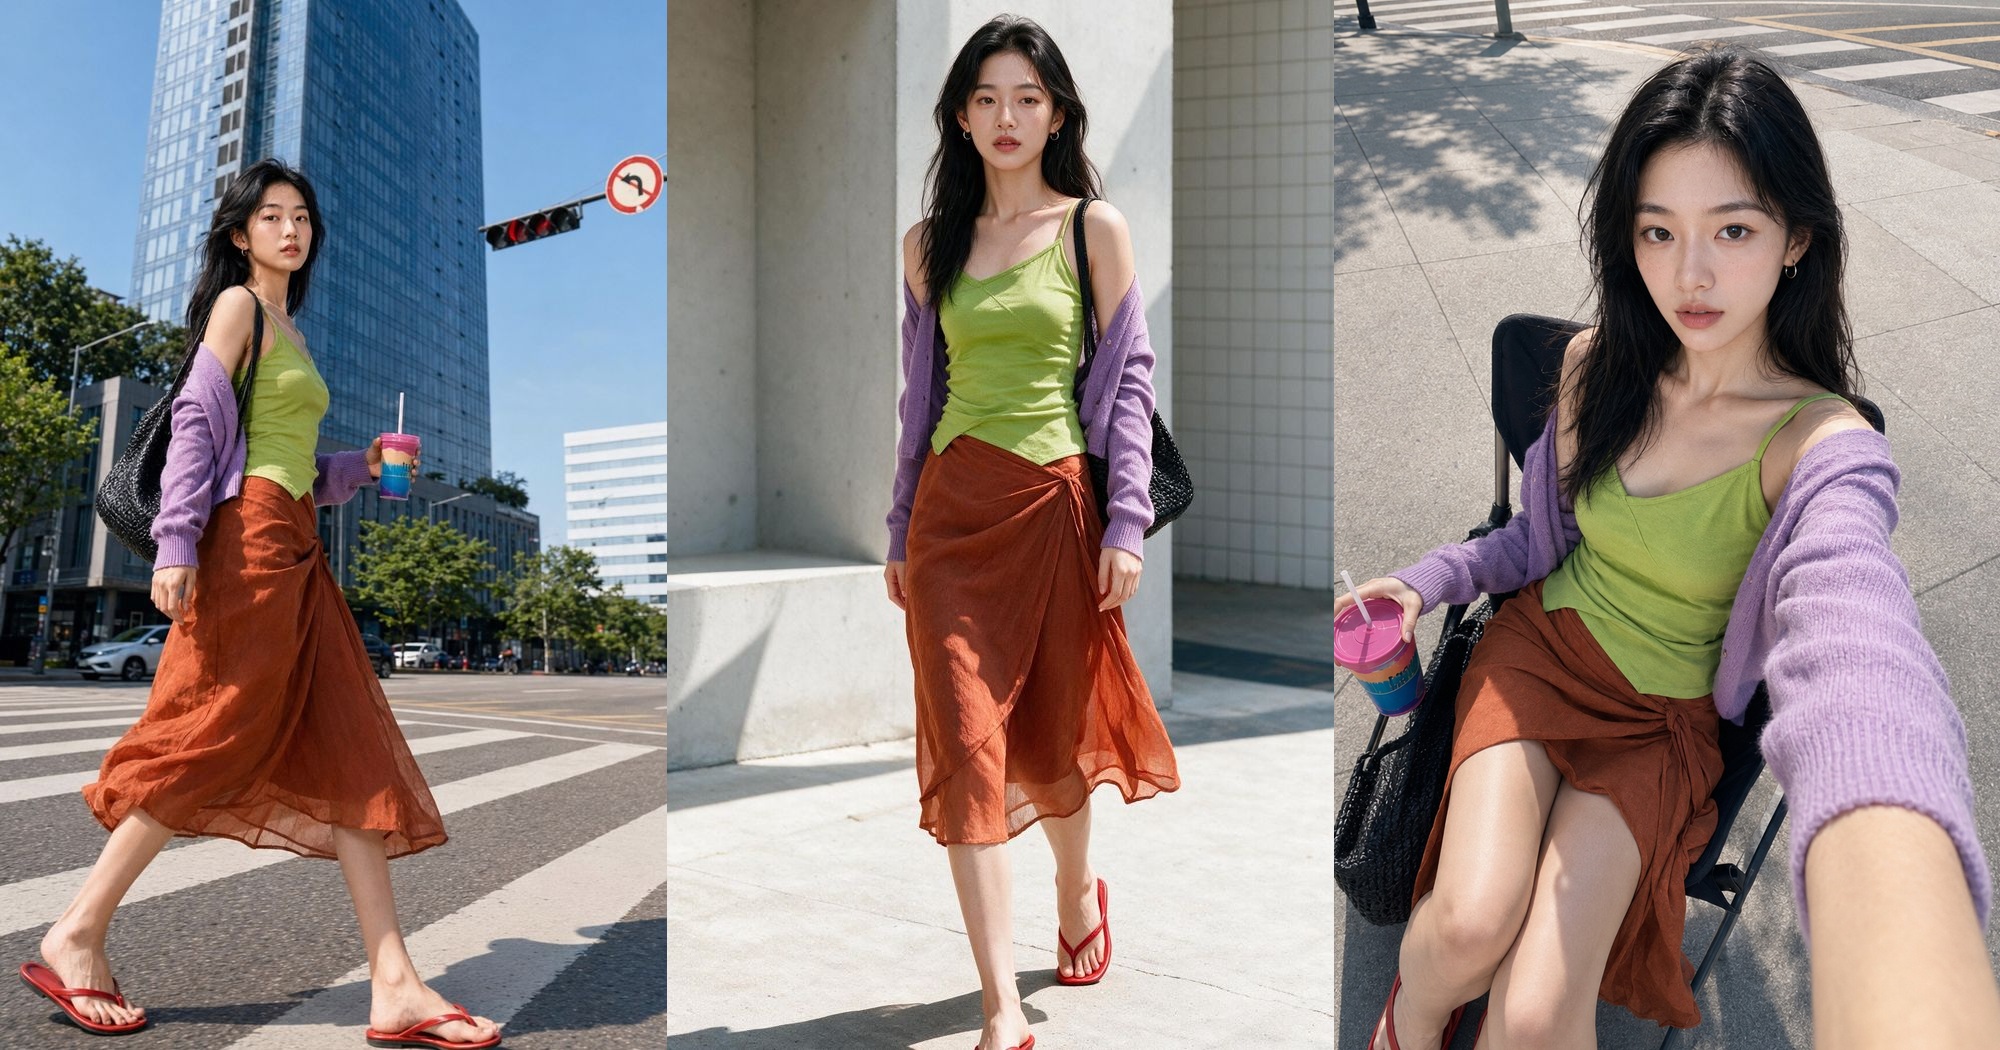
What should you establish first to make different scenes look like the same model in the same shoot?
The model's face and outfit often changed from scene to scene, and adding motion could distort even her walk and expressions. Creating several still images and connecting those scenes to look like one shoot were two different challenges.
Rather than work through a platform's features in sequence, I approached this project by first separating out the things that must not change, then checking them at every stage.
It began with hands-on experience.
My starting point was a single front-facing, full-body photo of a model wearing a white tank top and denim. I first upscaled it in Magnific, then expanded it into a model sheet that let me examine the shape of her eyes, nose, lips, jawline, and hair silhouette from several angles. I was creating a reference standard for the next rounds of generation.
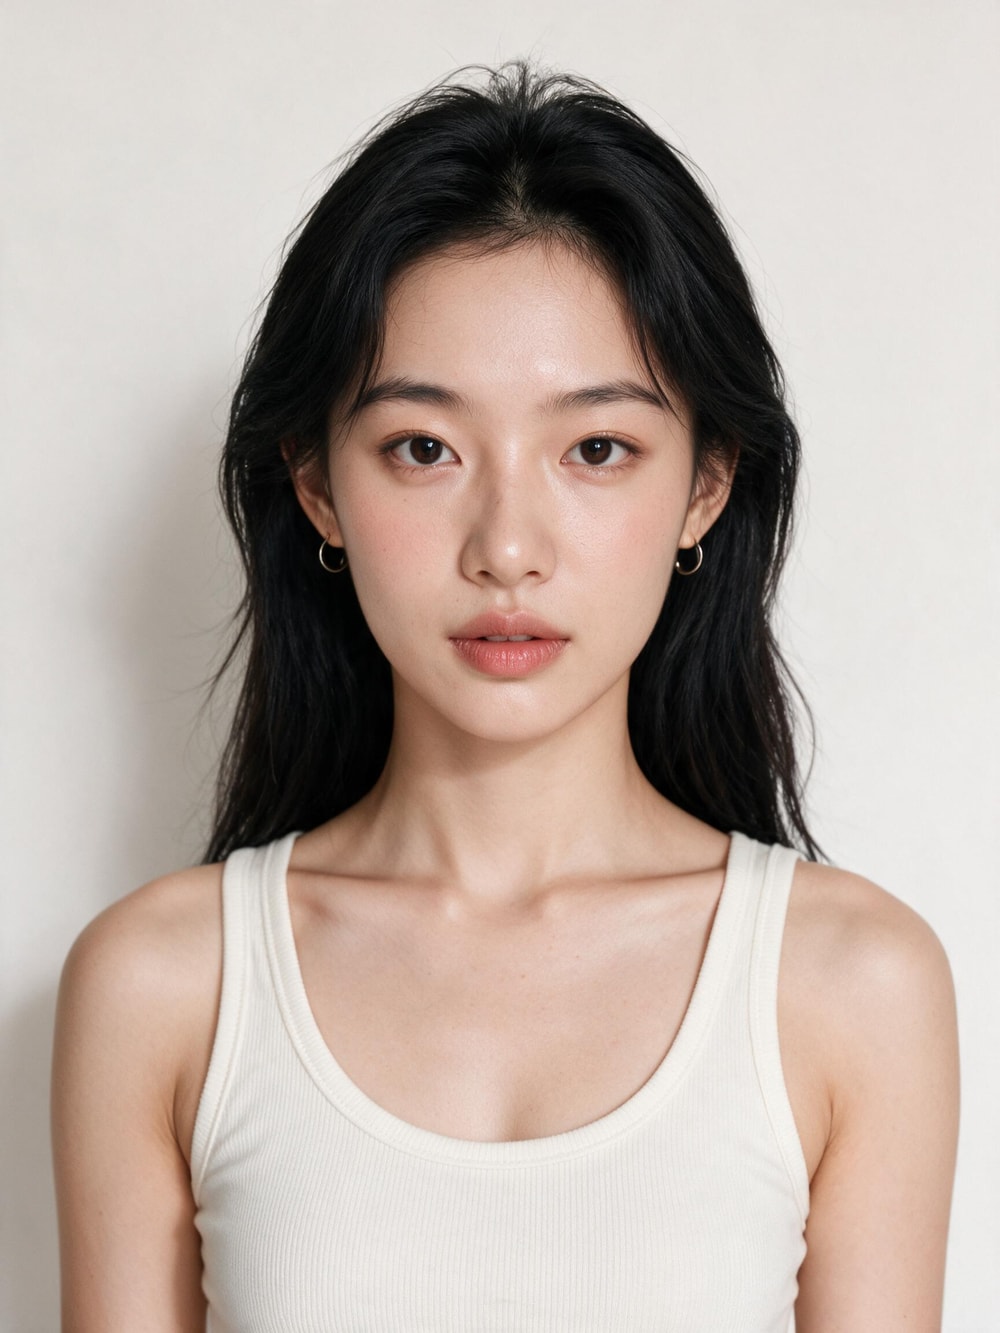
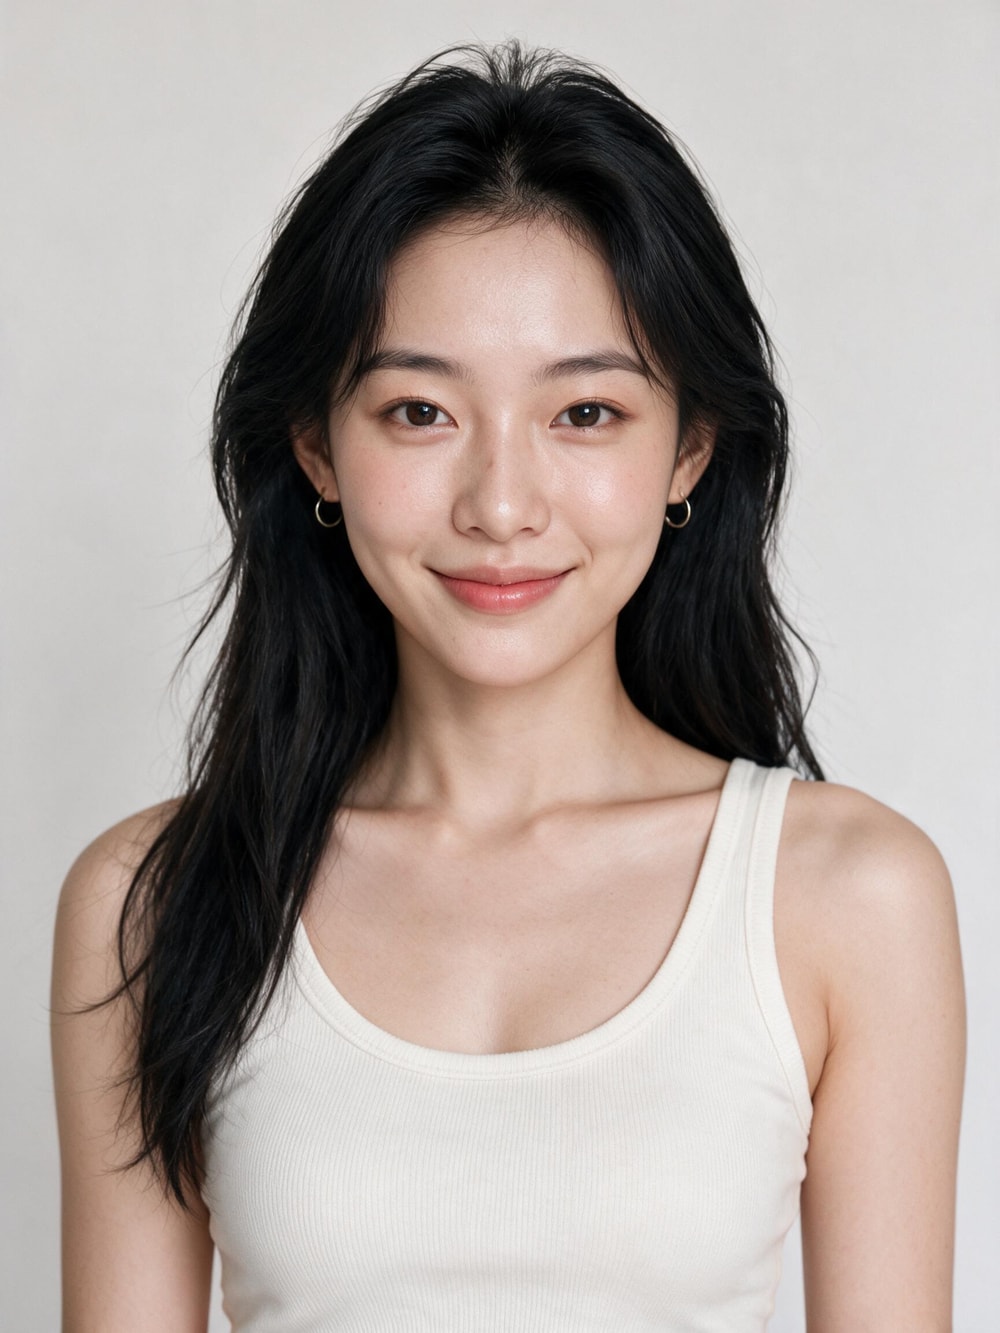
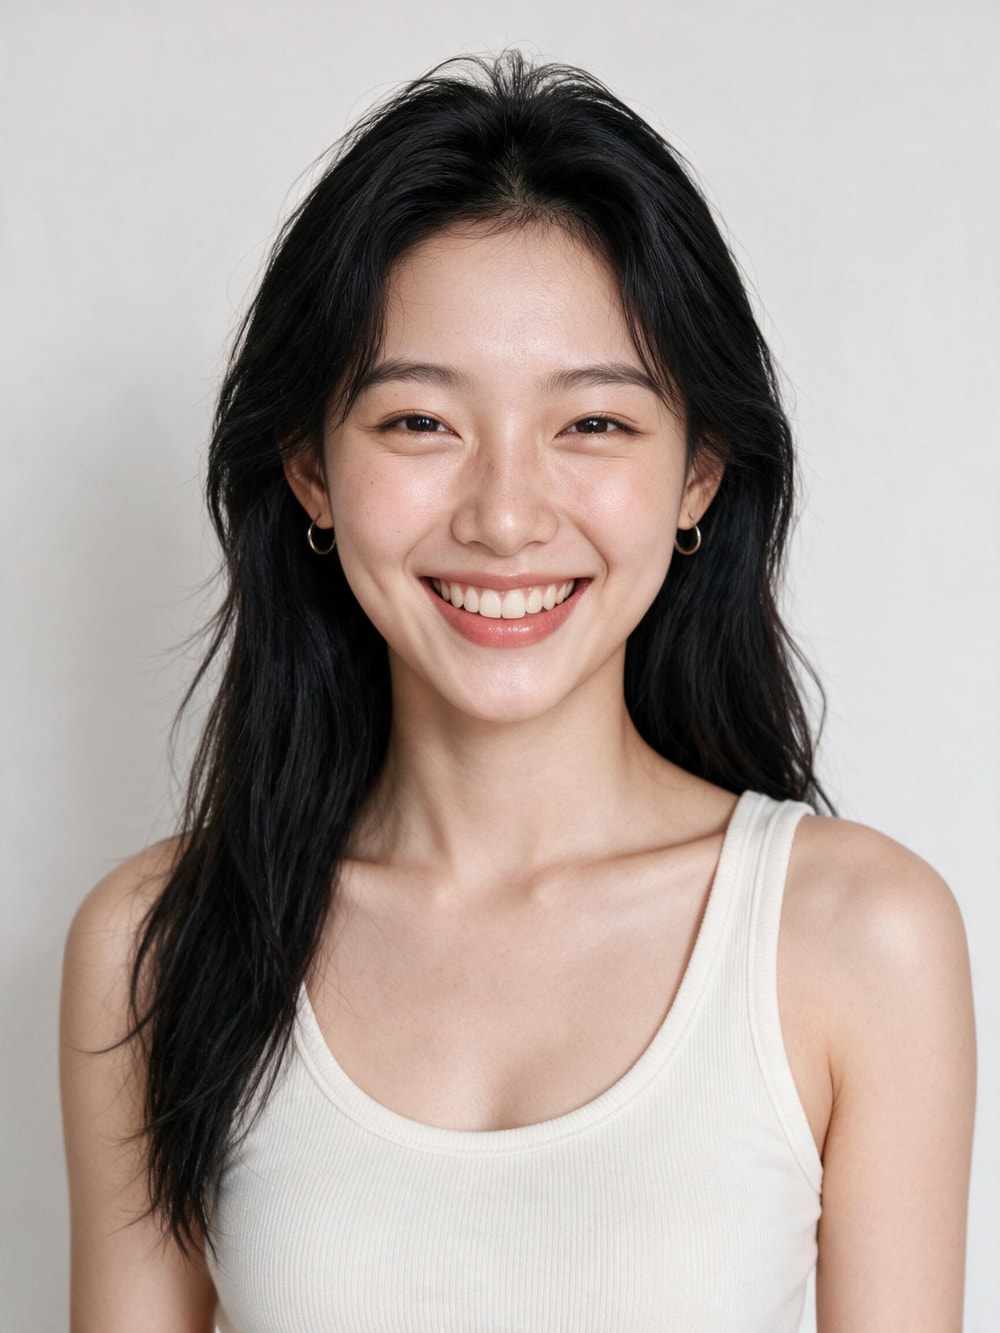
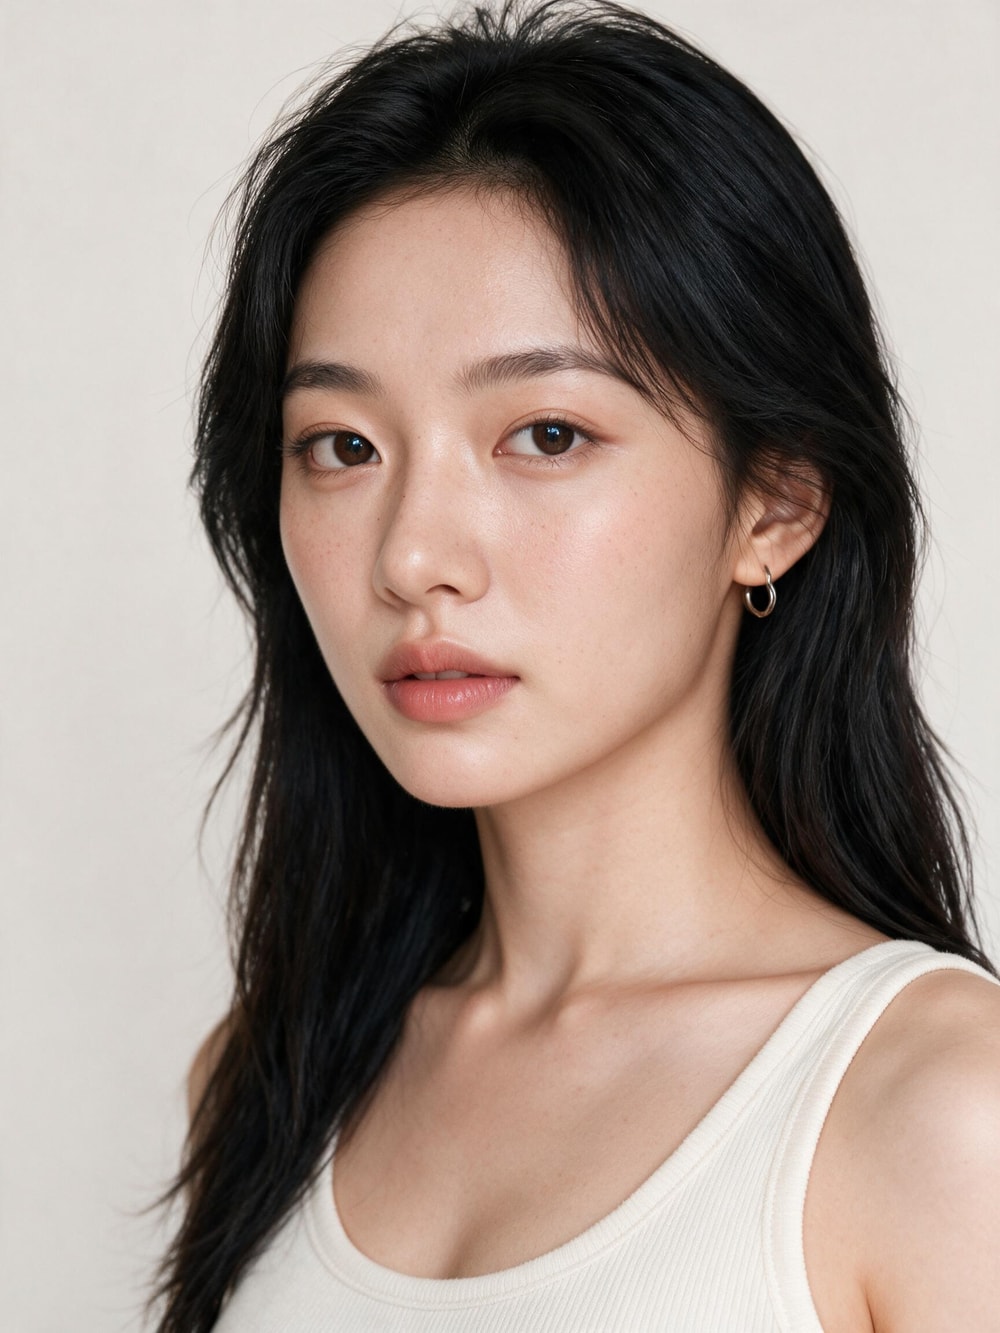
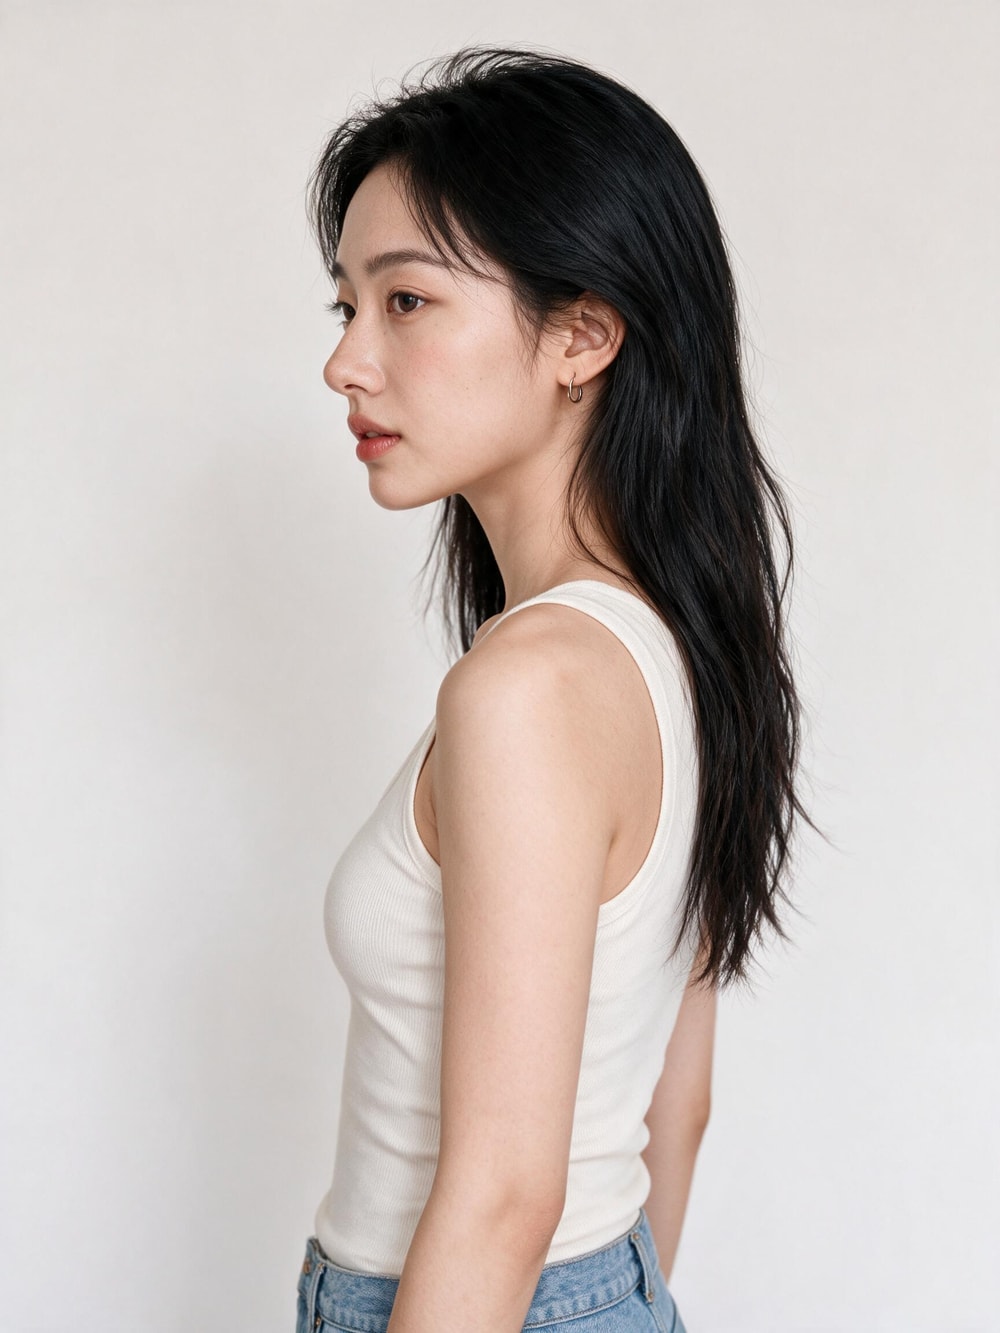
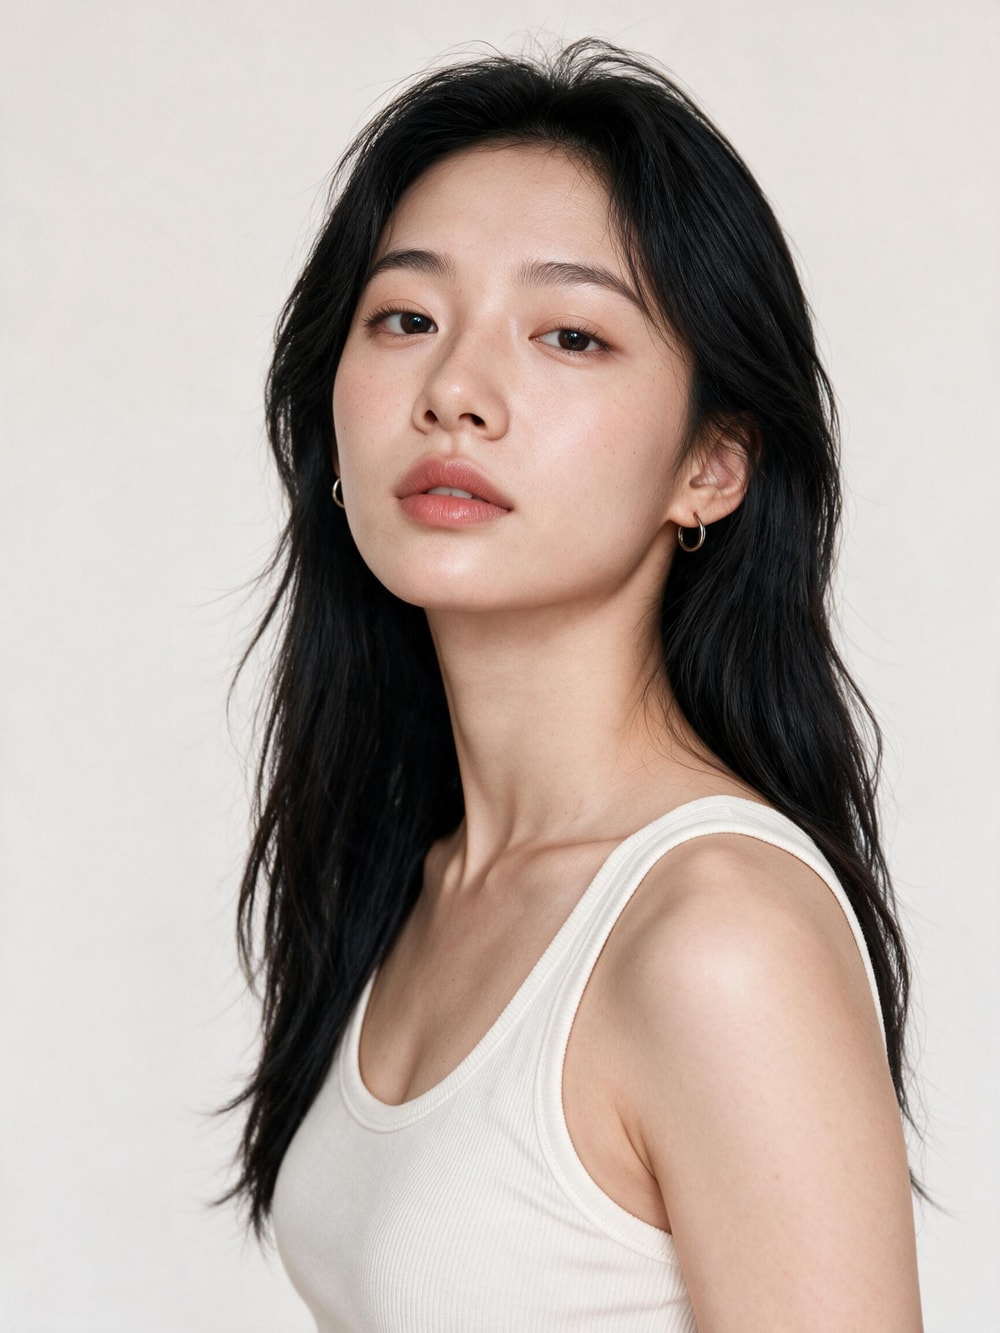
IDENTITY SHEET — I used six close-ups with the full face in frame to check whether she still looked like the same person across different angles and expressions.
Next, I defined the outfit separately. I broke down the lime sleeveless top, lavender cardigan, terracotta wrap skirt, red flip-flops, and black woven bag into color, material, layering, and accessories. Rather than follow the reference photo's composition or pose, I transferred only the relationships that made the styling work.
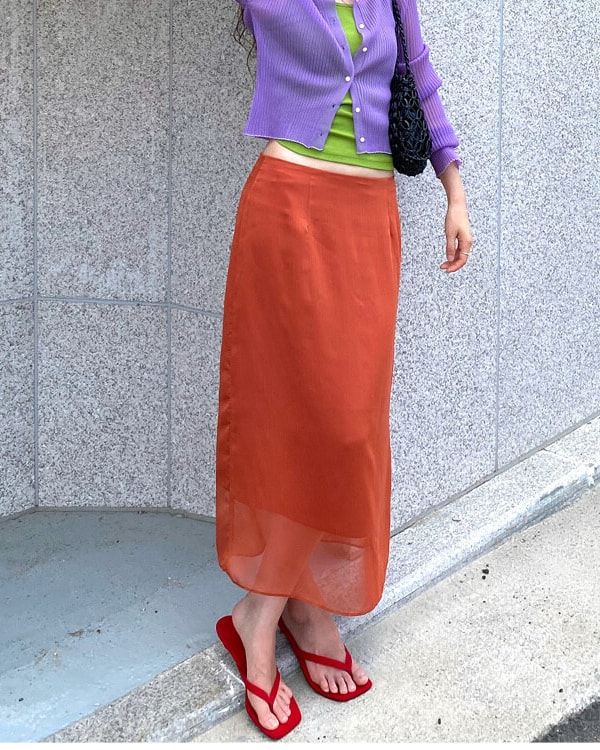
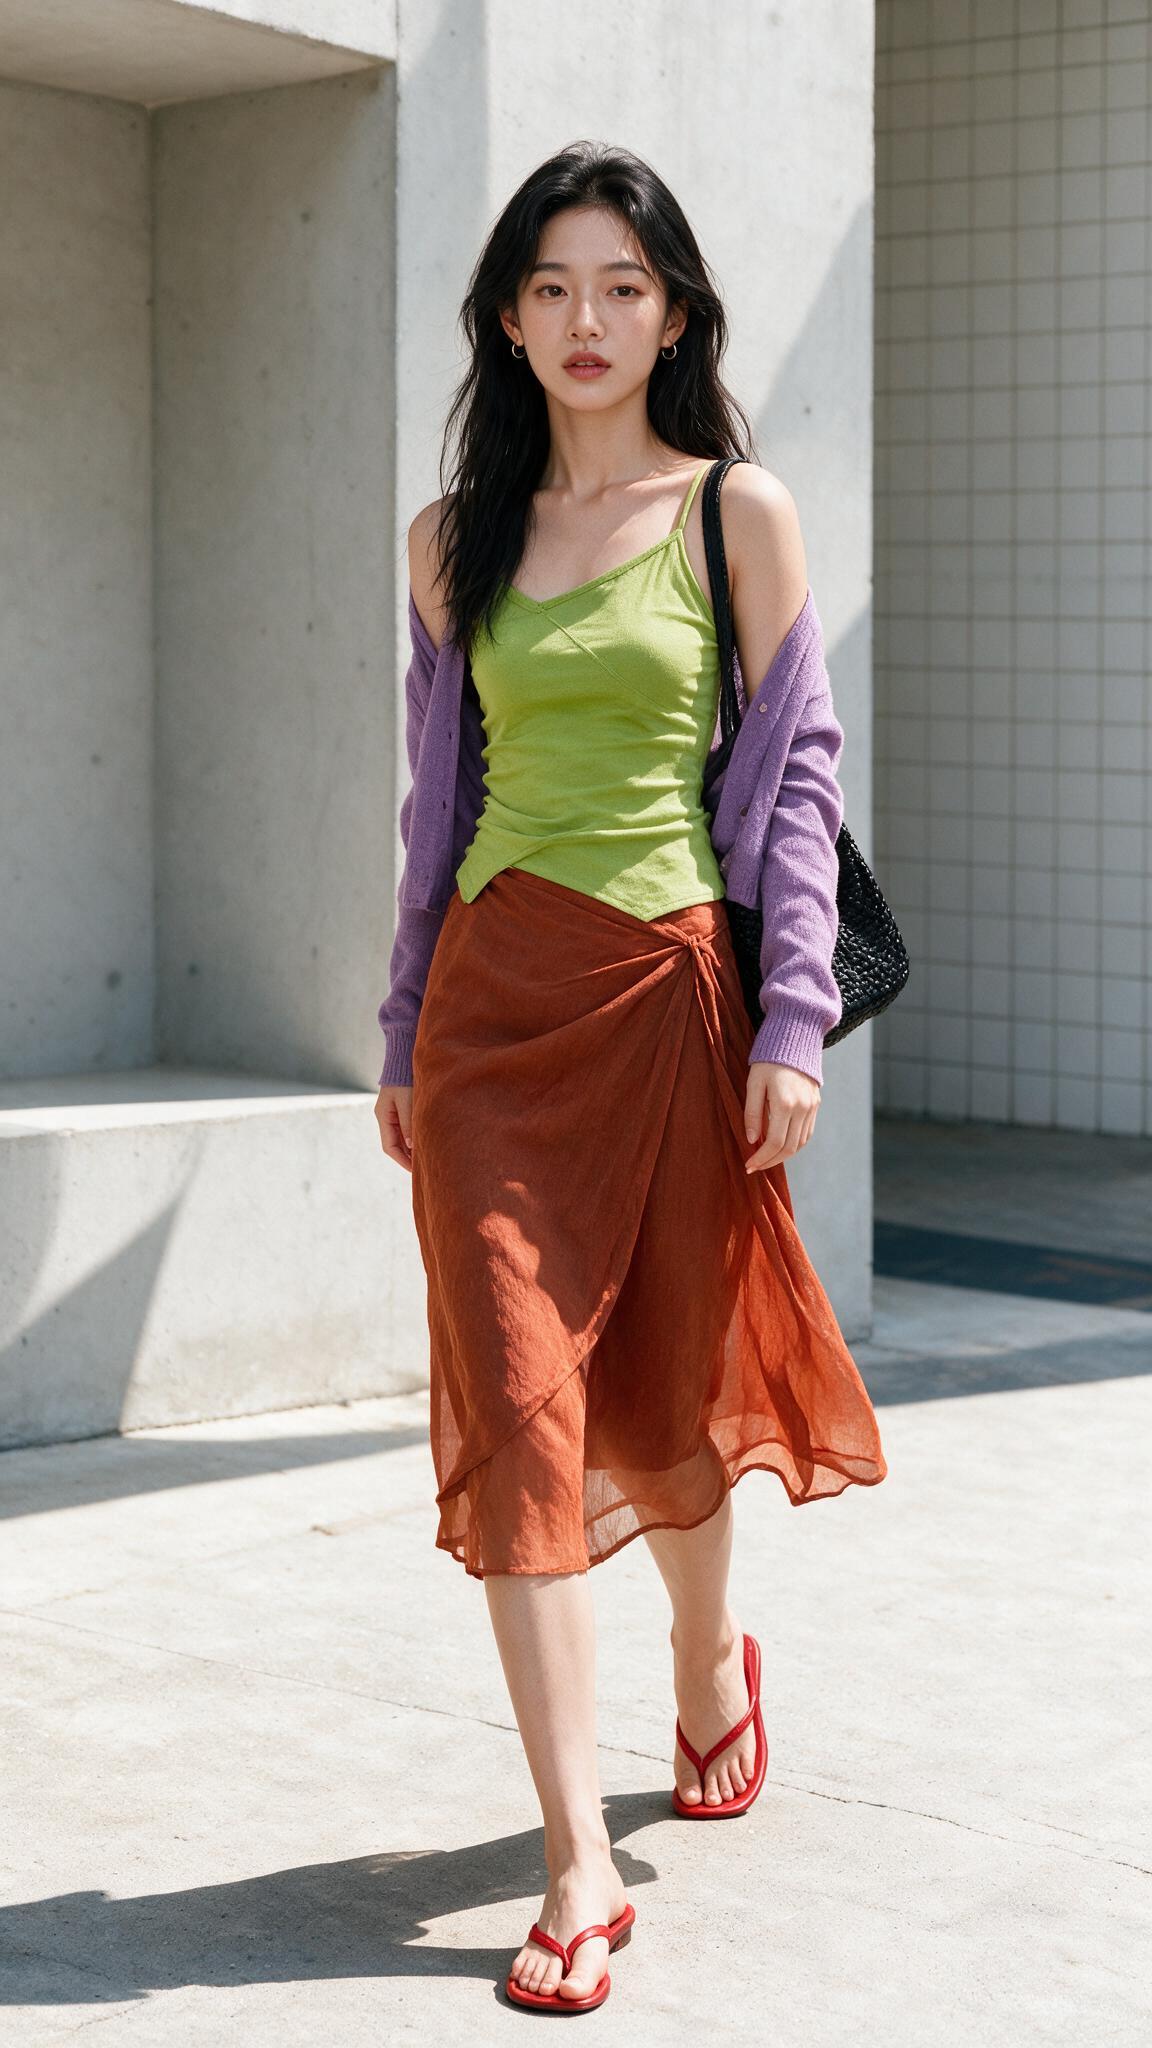
OUTFIT REFERENCE & RESULT — I compared one reference image showing the complete look with one generated image applying the same outfit combination to the reference model.
Once the reference keyframe was stable, I expanded the scenes to include a low-angle shot, waiting at a traffic signal, a high-angle shot, a side view, a selfie, and a bird's-eye view. Changing just one element at a time, whether camera height, distance, or body orientation, made it easier to identify what was causing a result to drift.
I did not use every generated result in the actual edit. First, I rejected still-image candidates in which the face, hands, feet, outfit, or bag had changed. Even when an image looked natural, I removed the shot from the timeline if animating it distorted the walk, expression, hair, or movement of the clothing.
The quality of an AI lookbook comes not from generating more images, but from a process of selecting and regenerating them against the same standards.
— Park Siha, Creative Director
Key perspective
Making the scenes look like one shoot was not just a matter of facial resemblance. The shots connected into a shared time and place when the person, styling, scene, movement, and sound each stayed consistent with their own reference standards.
I did not ask one reference image to do everything, either. The model sheet was my reference for the person, the fashion reference for the outfit, and the first keyframe for the lighting and space. When each reference had a clear role, I could quickly identify what needed to be regenerated whenever a result drifted.
- 01Identity anchor
Establish consistent eyes, nose, lips, jawline, and hairline across multiple angles. - 02Style anchor
Manage the color combination, materials, layering, and accessories as a separate reference. - 03Scene anchor
Define the light, space, lens, and camera height for each scene. - 04Motion rule
Design the person's subtle movements and the response of the clothing first. - 05Sound continuity
Connect the sound so that the scenes feel like the same time and place, even across cuts.
I also judged the success of a still image separately from the success of a video scene. A good keyframe could still produce distortions in the person once animated, and individually strong scenes could lose their rhythm when joined together.
Finally, I rebuilt the music and ambient sound as one continuous span of time rather than dividing them by scene. Even when the image changed, continuous footsteps, city atmosphere, and fabric rustle made the breaks between shots less noticeable.
Six steps to creating an AI lookbook film
What mattered more than any service's features was which reference standards I established, and in what order. These are the six steps I followed in the actual project.
- 01Source & Upscale
Decide what must not change before upscaling.
Even increasing resolution can change how a person looks.
In Magnific, I restored skin texture, hair edges, the construction of the clothing, and the denim texture. I kept the settings low, however, so that the facial proportions, body shape, pose, and hair silhouette would remain unchanged.
KEEPFacial proportions, body shape, pose, hair, and background structure
AVOIDExcessive skin retouching, enlarged eyes, and changes to the hair silhouette
Upscale promptHigh-fidelity portrait and full-body upscale. Preserve the exact facial identity, body proportions, pose, hairstyle silhouette, clothing construction and background geometry. Recover natural skin texture, individual hair strands, rib-knit fabric and denim weave. Clean studio detail, realistic pores, no beauty filter, no facial redesign, no body reshaping.
- 02Identity Sheet
Build facial references across multiple angles and expressions.
One front-facing photo was not enough to define the profile and changes in expression.
I created a neutral front view, a soft smile, a bright smile, a 45-degree view, a side profile, and a beauty angle, all with the same lighting and outfit. This sheet was not simply a collection of profile photos. It was a reference for checking the features that needed to stay fixed in subsequent scenes.
Identity promptCreate a professional six-image fashion model identity sheet of the exact same young Korean woman from the reference images. Preserve her eye shape and spacing, nose bridge and tip, lip shape, jawline, cheek volume, skin tone, natural asymmetry, long layered black hair and small silver hoop earrings. Minimal clean makeup, realistic skin texture, neutral off-white studio, soft frontal daylight. Produce consistent close-up views: neutral front, soft smile, open smile, three-quarter, side profile and elevated beauty angle. Keep the full head, jawline and shoulders inside every frame. No face redesign, no age change, no glam retouching.
- 03Styling Transfer
Transfer the outfit element by element, not the whole photograph.
Rather than duplicate the reference photo, I isolated the elements that made up its styling.
I defined the colors, materials, silhouettes, layering, and accessories individually, then applied them to the reference model. Afterward, I checked not only the outfit's colors and materials but also the size and position of the bag and the shape of the shoes.
Styling promptDress the same identity-preserved model in a lime green asymmetric camisole, a soft lavender cardigan worn loose around the shoulders, a translucent terracotta wrap midi skirt, minimal red flip-flops, and a small black woven shoulder bag. Preserve the exact face, body proportions, hairstyle and natural skin. Contemporary Seoul street-fashion editorial, sunlit concrete architecture, realistic fabric drape and material texture.
- 04Scene Expansion & Selection
Expand the scenes by changing one variable at a time.
I kept the model and outfit fixed while changing camera height, distance, and body orientation one at a time.
To avoid repetitive full-body walking shots, I generated separate low-angle, high-angle, side-view, selfie, and bird's-eye-view scenes. I checked that each scene served a different purpose while still looking as though it belonged to the same day and location.
Scene variation promptGenerate a new shot from the same fashion film while preserving the exact model identity and complete outfit. Change only one cinematic variable at a time: camera height, lens distance, body orientation, gesture, or framing. Maintain the same bright midday Seoul concrete location, direct sunlight, natural hard-edged shadows, realistic skin and fabric. Editorial spontaneity, not a repeated catalog pose.
1ST GATE · IMAGEI checked facial resemblance, hands and feet, and consistency in the outfit, bag, and shadows.
2ND GATE · MOTIONI rejected shots with sliding feet, distorted expressions, unnatural speed, or warping in the clothing and background.
I animated only the scenes that passed the still-image review, and removed any shots that broke down again in motion from the edit. Rather than briefly hide an unnatural moment, I replaced the scene with a more stable shot.
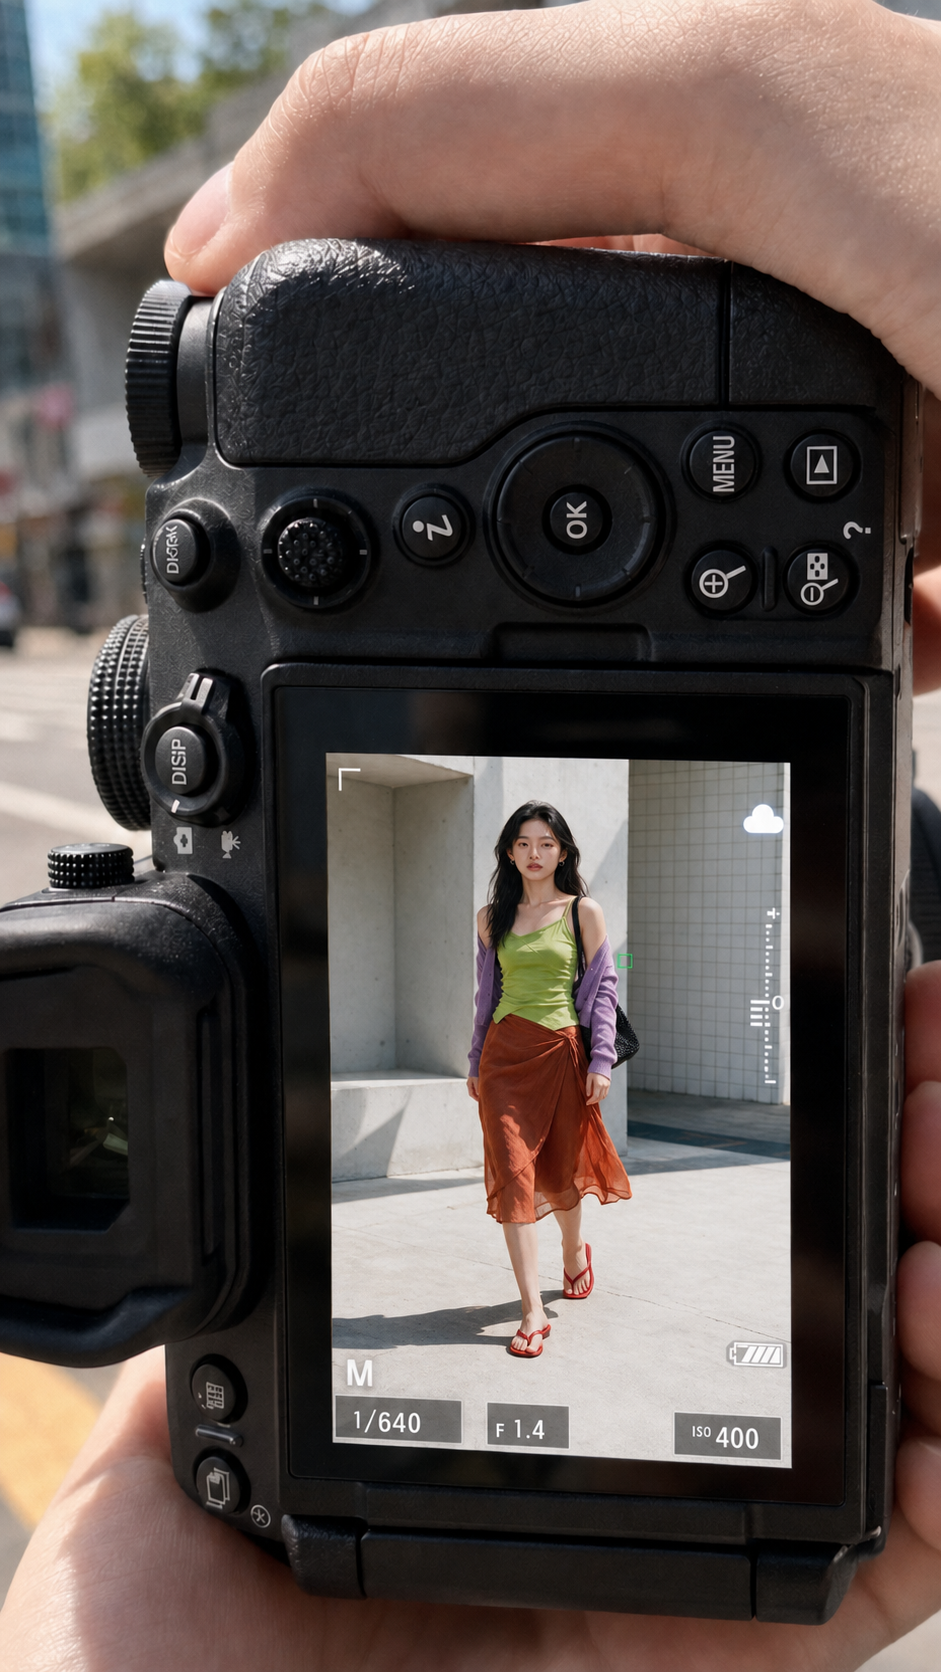
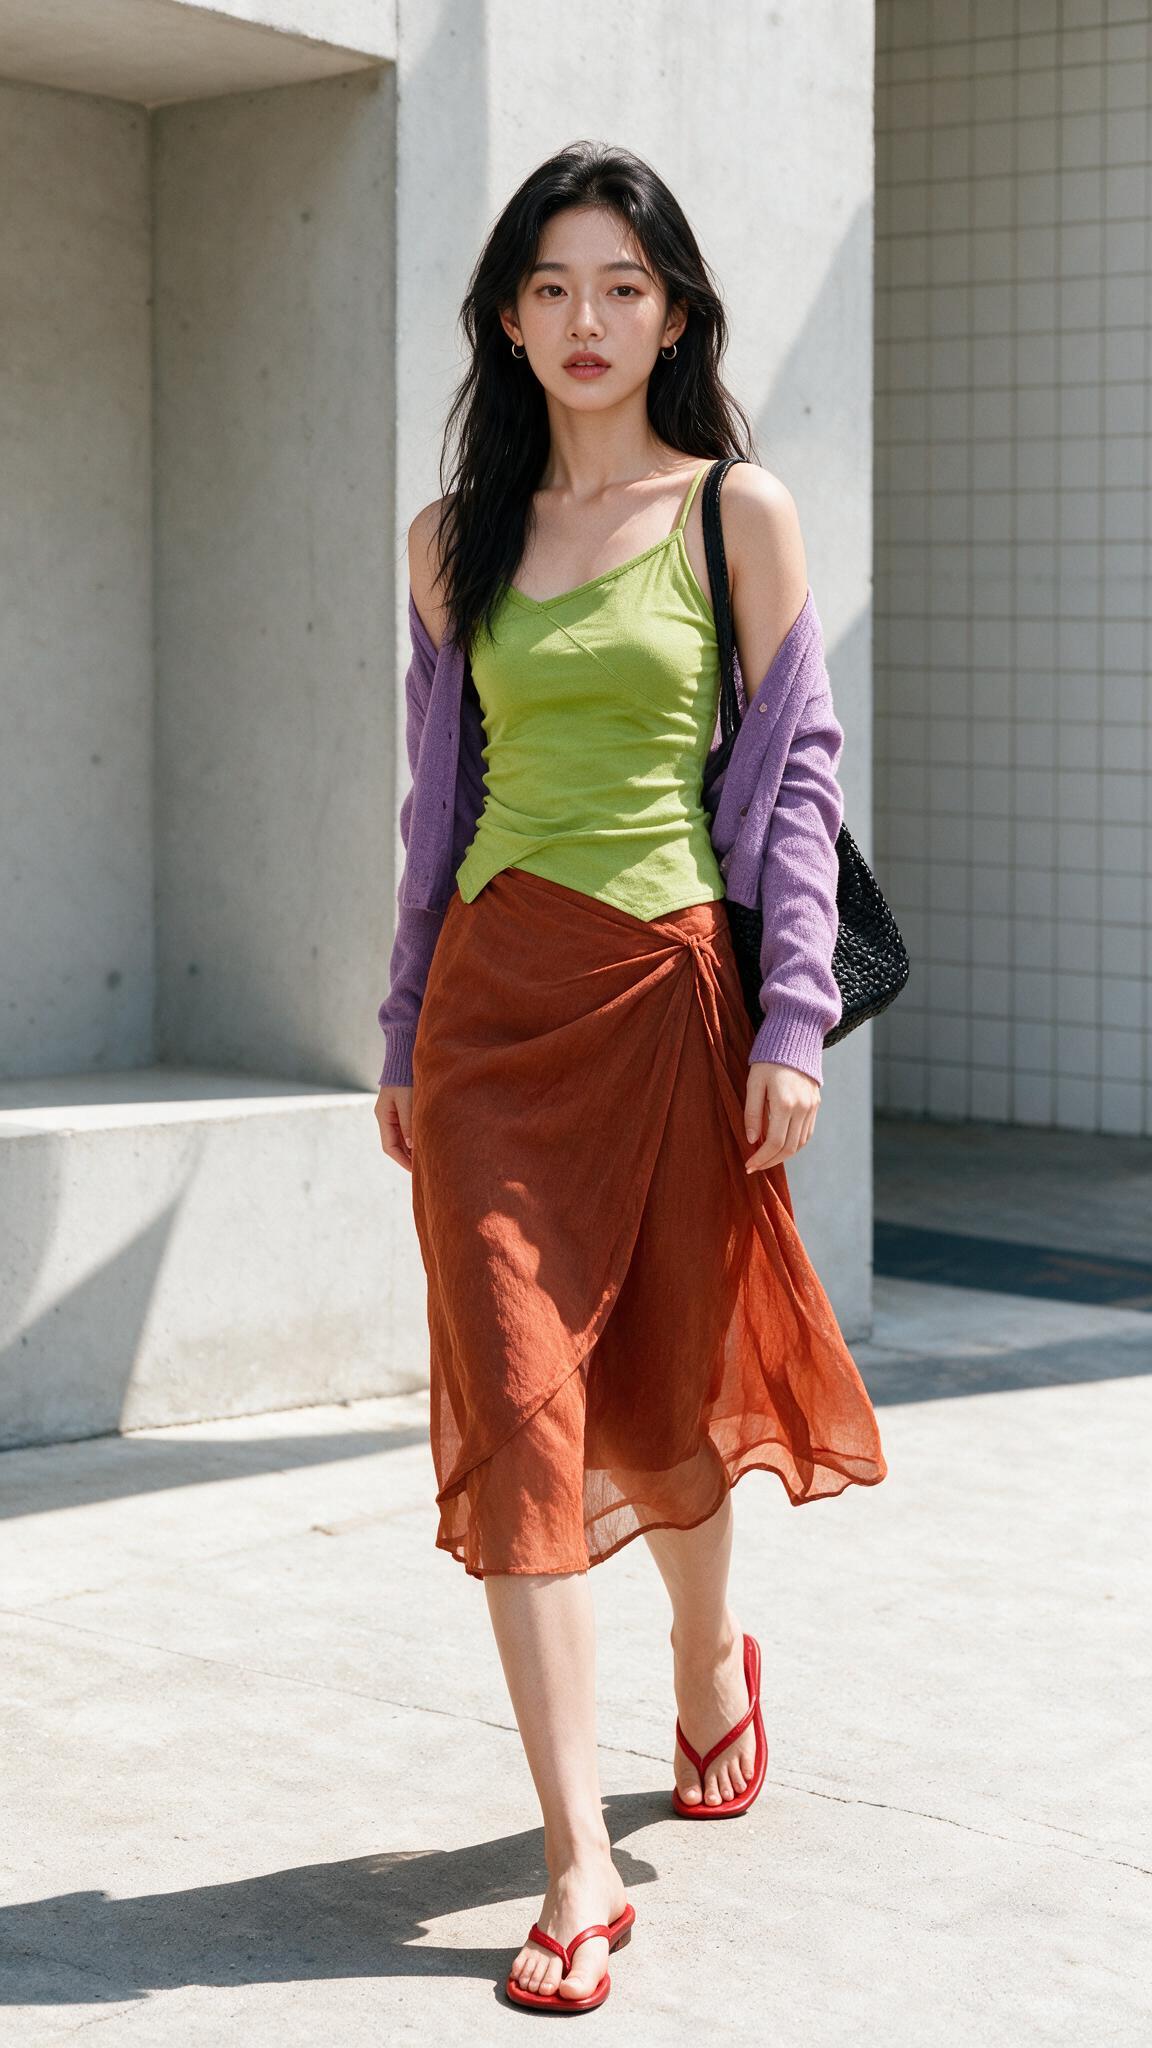
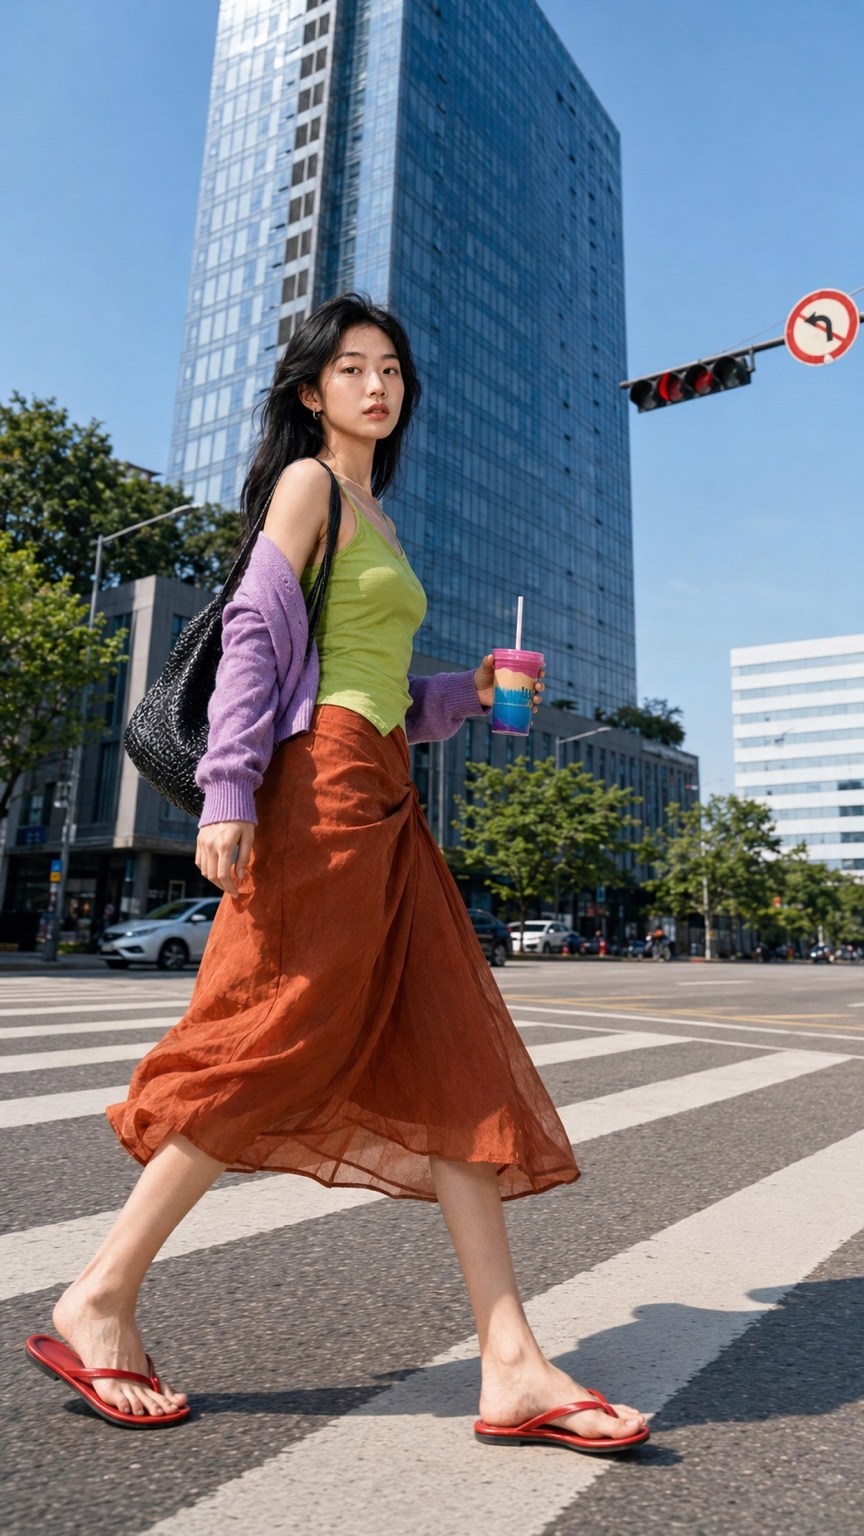
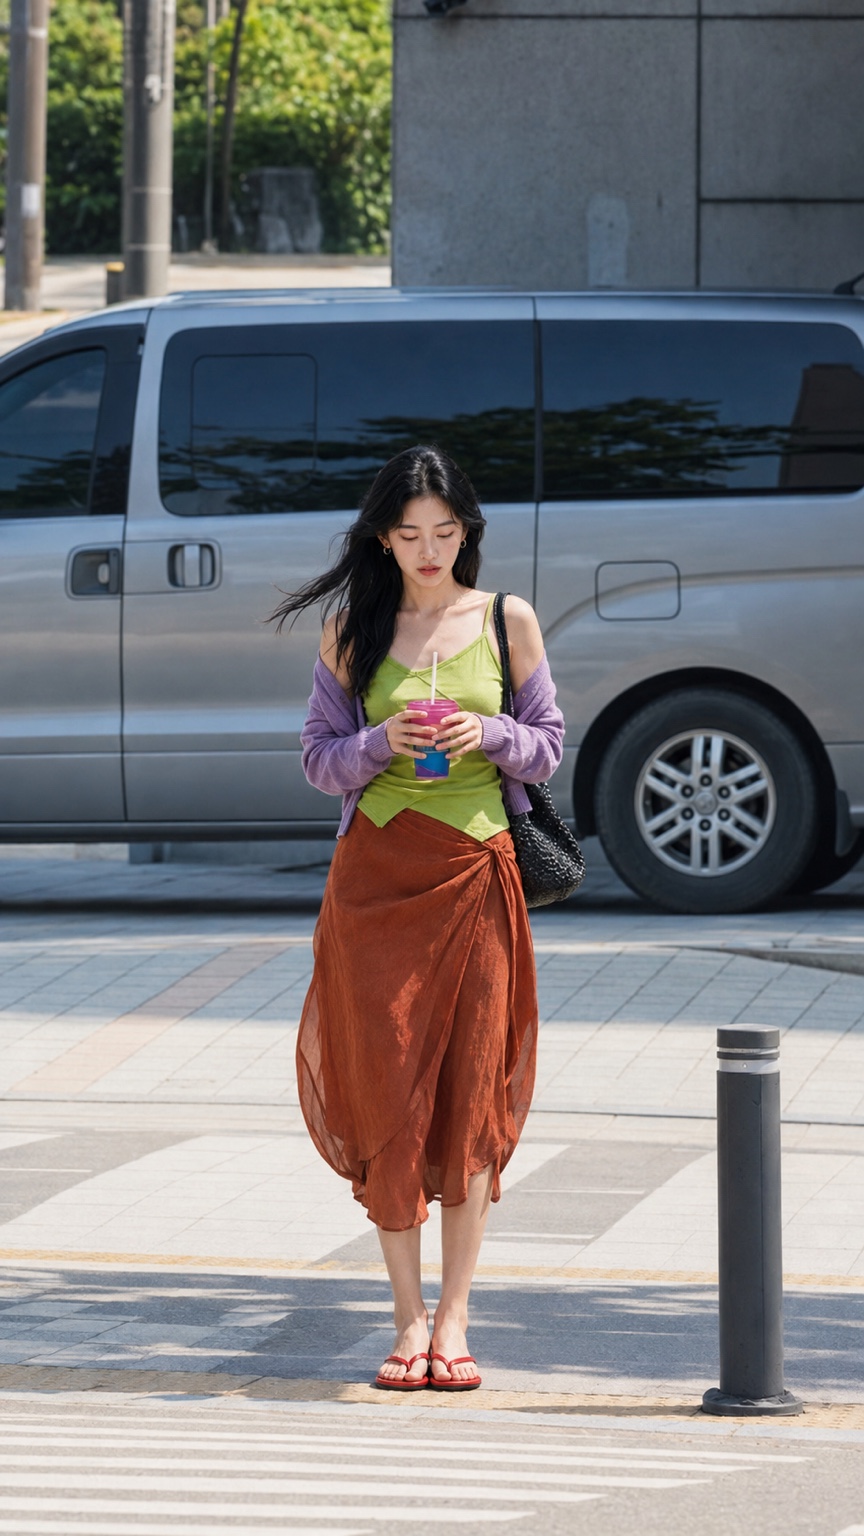
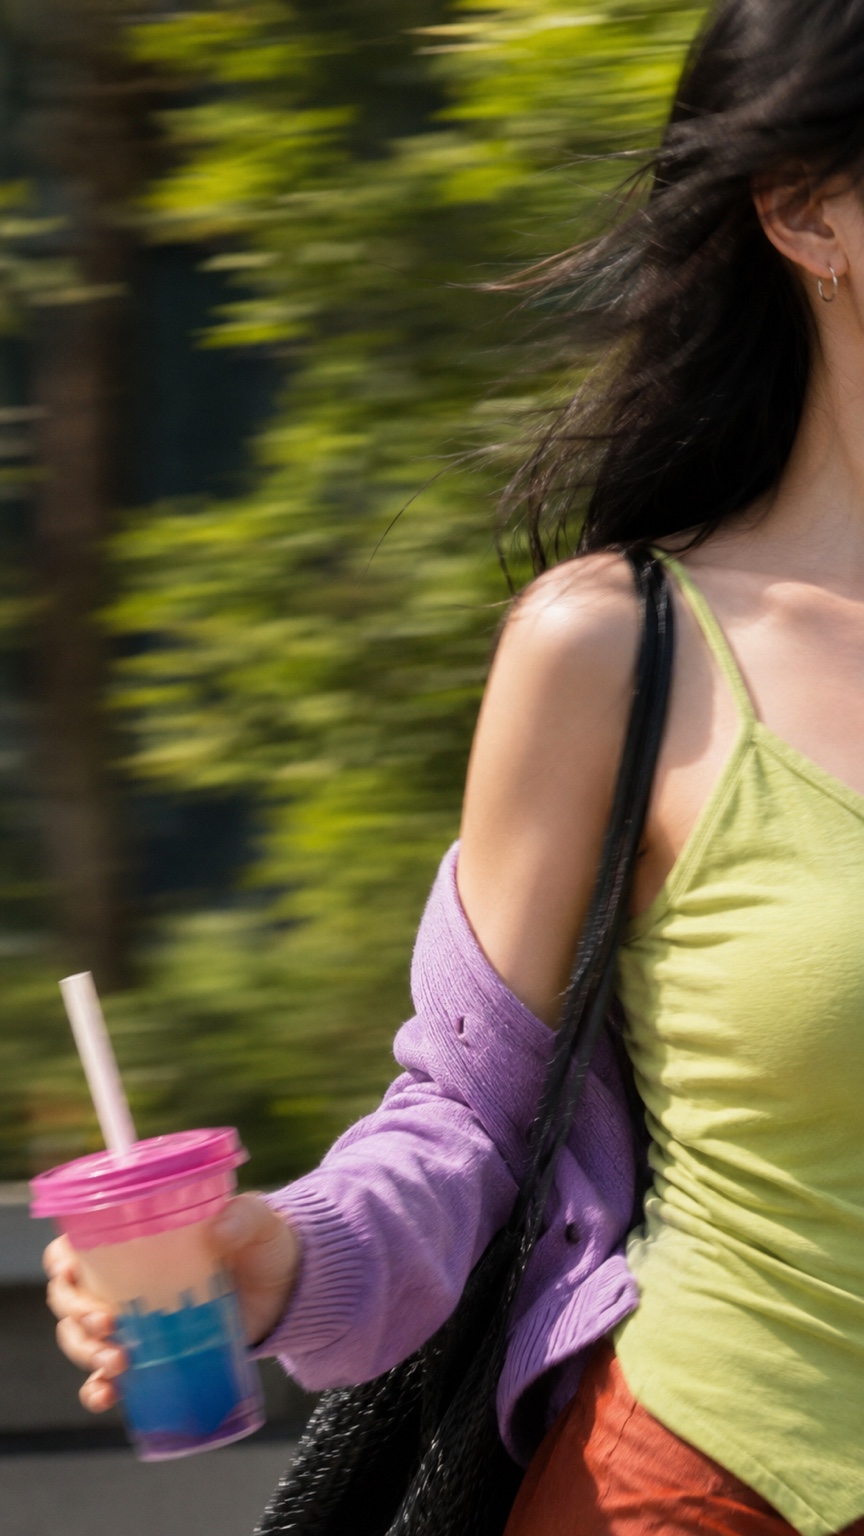
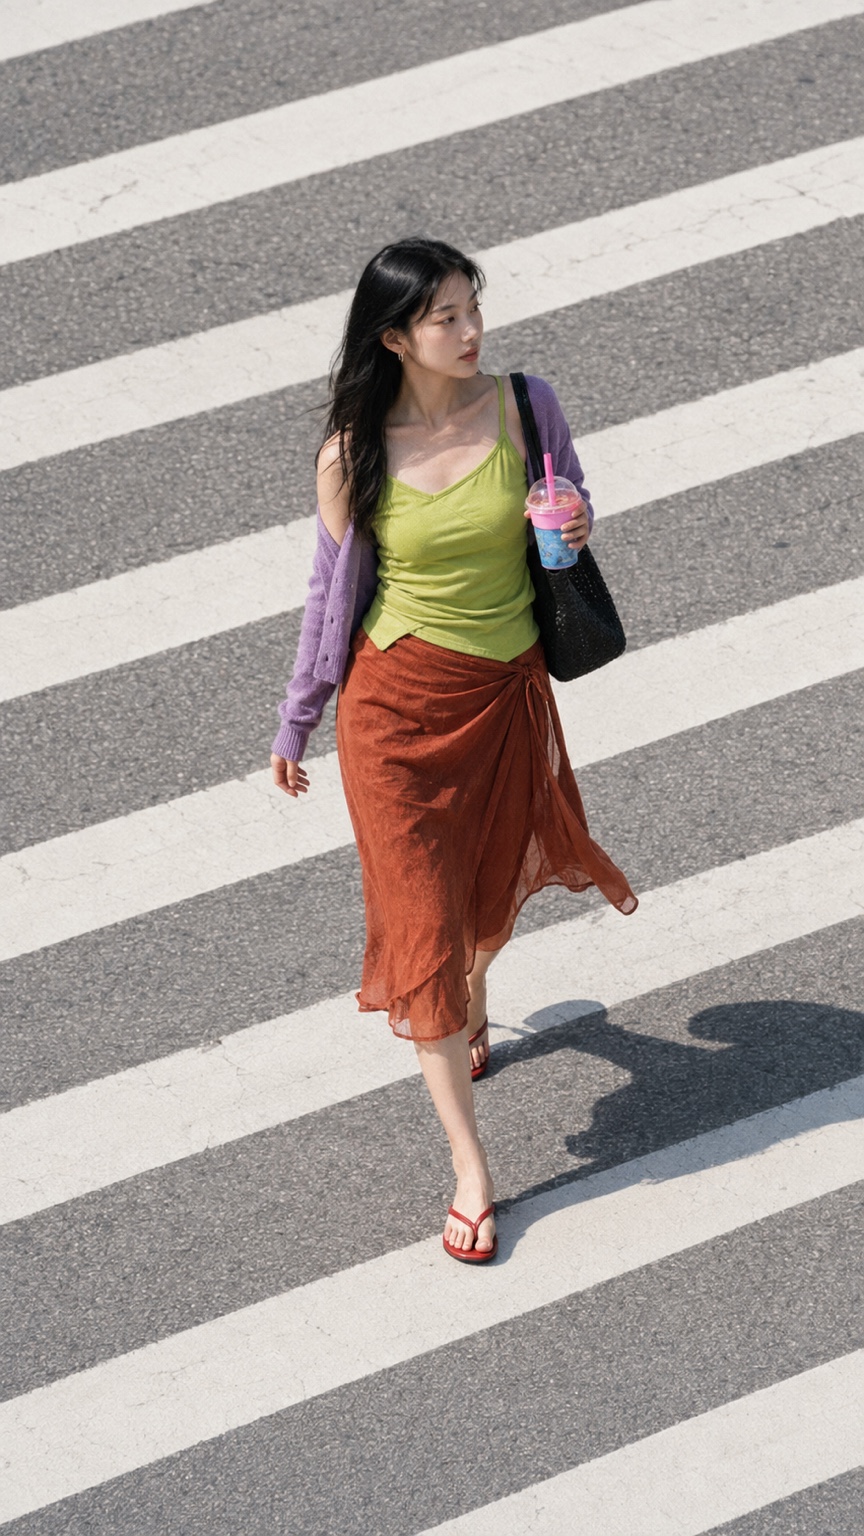
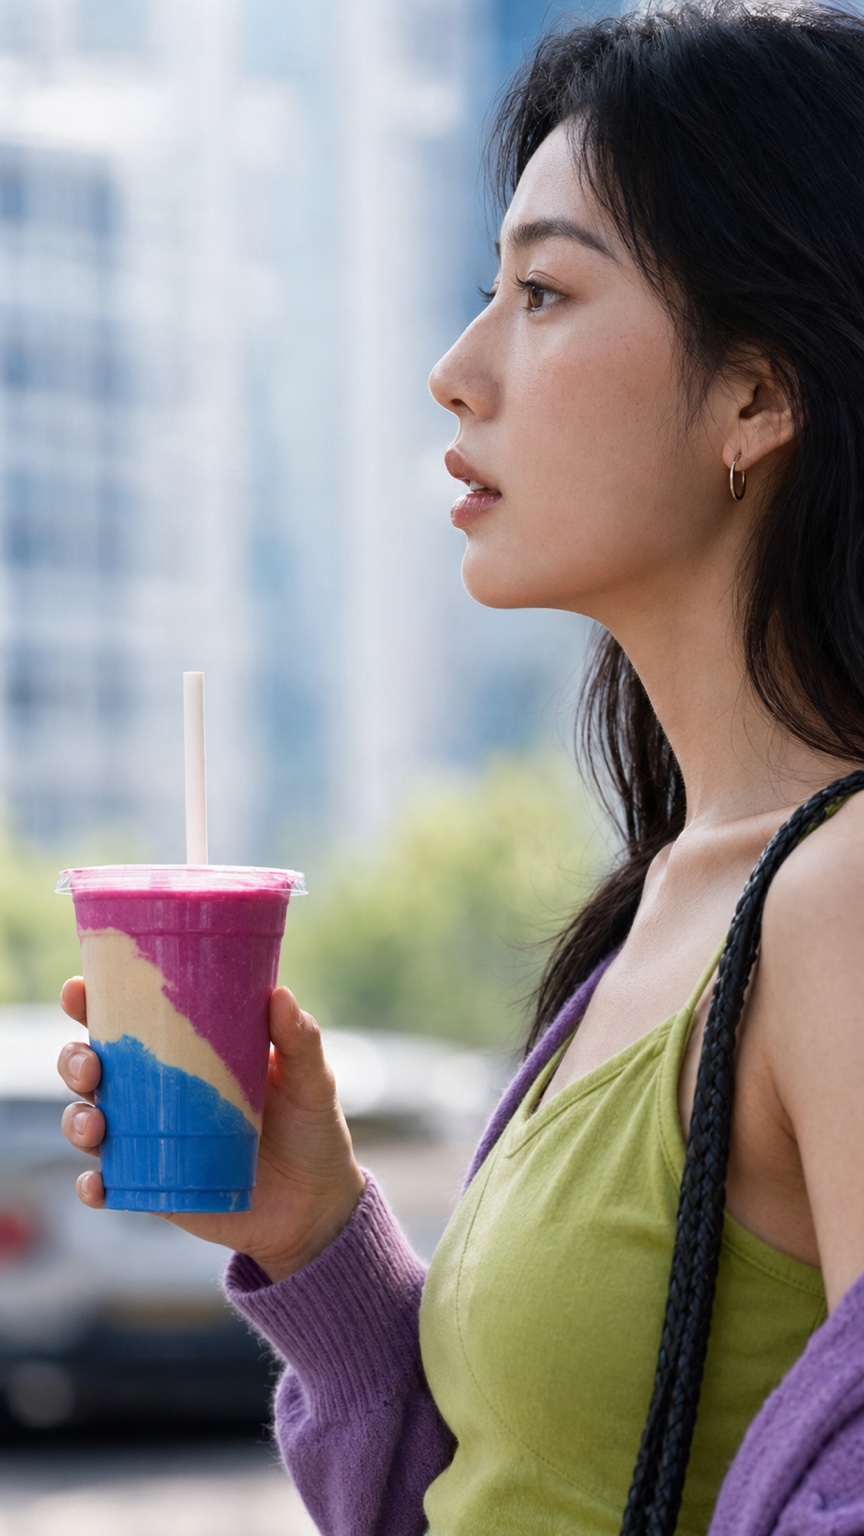
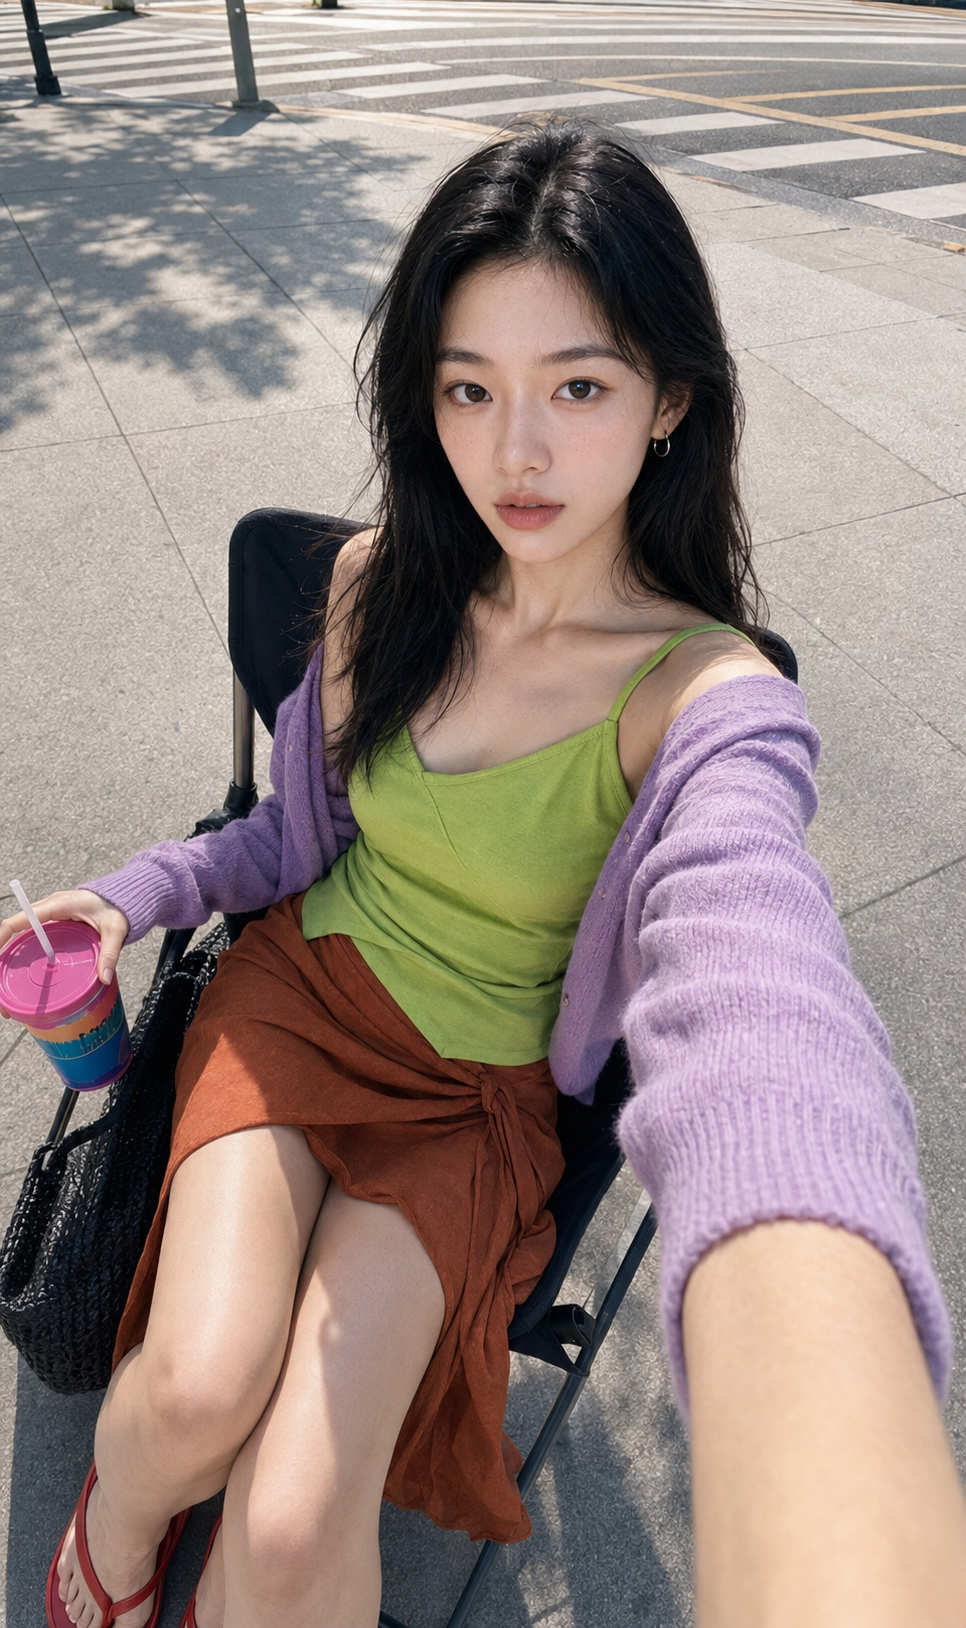
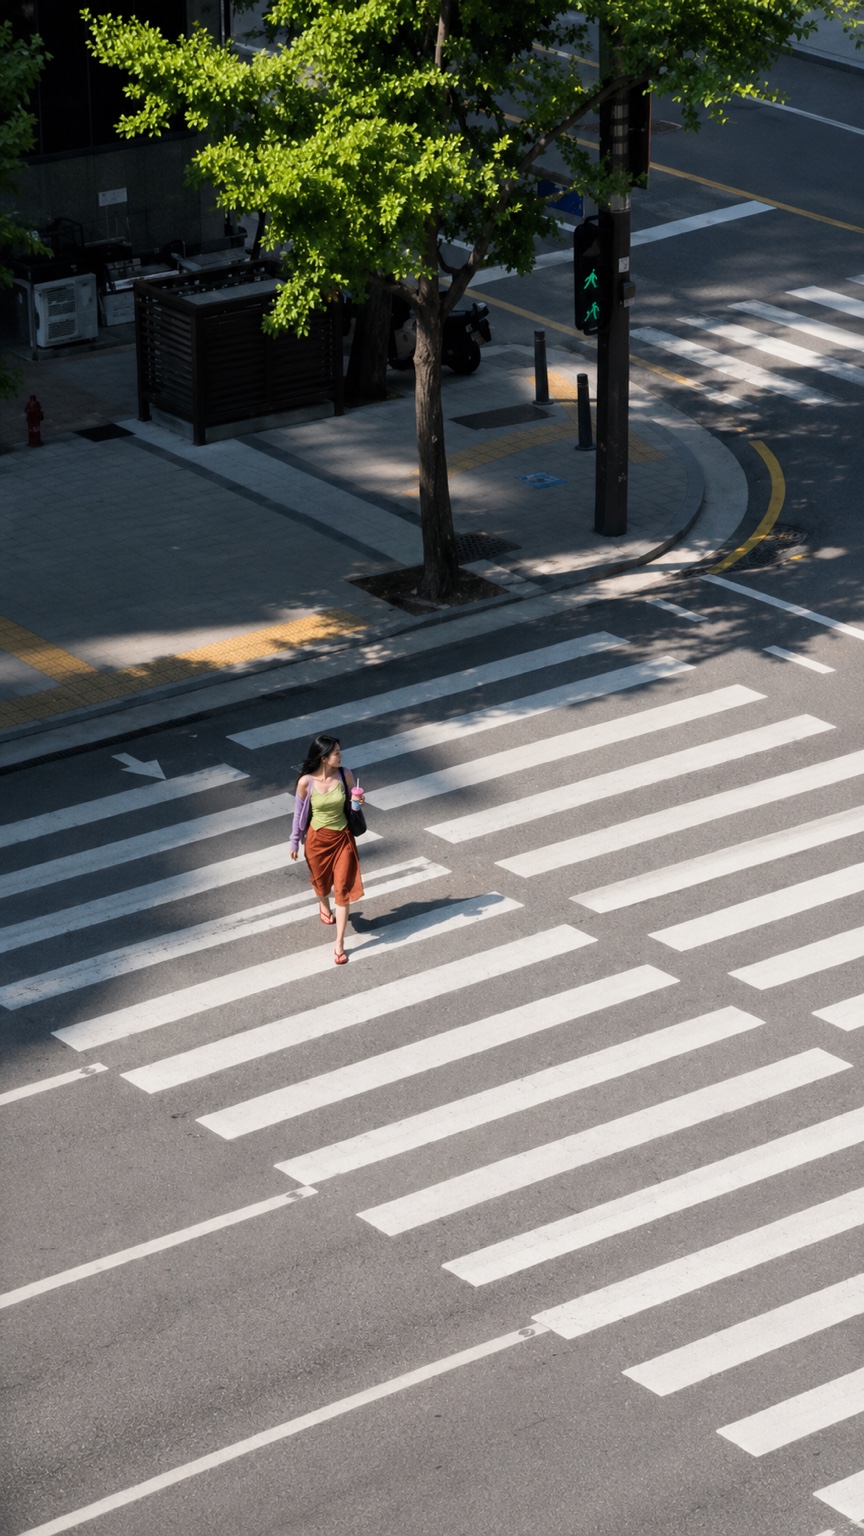
SELECTED IMAGE BOARD — From the walking shot on the camera screen to the final scene, these nine images were checked for consistency in the person, outfit, light, and space.
Editing decisionRather than use every generated result, I kept only the scenes that would not strike the viewer as unnatural.
- 05Motion Design
Review still images and video results separately.
Even when a still frame looked natural, excessive motion could easily distort the face, hands, and clothing.
I began by specifying the shift in weight while walking, brief changes in gaze, the response of the hair and skirt to the breeze, and the bag's gentle sway. I allowed the camera to track subtly, but limited larger movements that could cause the person's face to be reconstructed.
Motion promptThe model takes two natural, confident steps toward camera. Her weight shifts realistically through hips and shoulders; the terracotta wrap skirt and loose lavender cardigan respond to a light summer breeze; the small woven bag sways gently. Subtle blinking and breathing, calm direct gaze. Smooth handheld tracking with minimal parallax. Preserve her exact face, hands, outfit and body proportions. No morphing, no sudden acceleration, no extra limbs, no camera orbit.
- 06Sound & 4K Finish
Create a shared sense of time and place before focusing on music.
Different sound in each scene exposed the edit points, even when the visuals looked natural.
I removed all the music remaining in the early edit and created a new 20-second instrumental in Higgsfield to match the film's length. Over it, I layered quiet footsteps, distant traffic, city atmosphere, and fabric rustle to connect the scenes.
Higgsfield music prompt20-second seamless instrumental for a sunlit Seoul street-fashion film, contemporary Korean indie electronic with restrained UK garage rhythm, warm bass, crisp two-step drums, airy glass synth plucks and subtle organic percussion; youthful, stylish, editorial, confident; immediate hook, gentle mid-section lift, clean resolved ending; no vocals, no speech, no lyrics, no cinematic trailer effects, no abrupt cuts, no corporate stock-music feeling.
Final soundtrackHiggsfield music + city ambience + footstepsGenerating the music in Higgsfield used 1.25 credits. I upscaled the final film from a 1080 × 1822 edit to 2160 × 3644.
How to apply this to your next project
This approach is not tied to any particular tool. After generating a scene or turning it into video, work through the following questions in order to quickly filter out problematic scenes before adding them to the timeline.
- 01Do the relationships between the shape of the eyes, nose, lips, and jawline remain the same in front and side views?
- 02Are any apparent changes in the hairline and hair length due only to the camera angle?
- 03Are the colors and materials of the top, cardigan, skirt, shoes, and bag the same in every scene?
- 04Do the direction of direct sunlight and the edges of the shadows suggest the same time of day on the same day?
- 05Does each scene have a clear role as a low-angle, eye-level, high-angle, or close-up shot?
- 06Does the movement preserve the shape of the face, hands, shoes, and clothing?
- 07Is the music uninterrupted, and do the footsteps and ambience help conceal the cuts?
- 08Have you checked the AI-generation disclosure and music licensing appropriate to the intended use?